Customers
- Developer
- Support
Customers > Customers
The following guide explains how to add a customer to Tuntinetti, how to add a certain pricing to the customer and how to add details to a customer in the Customers tab.
There is an instruction video about the topic here: Customers CRM - Tuntinetti
Customers
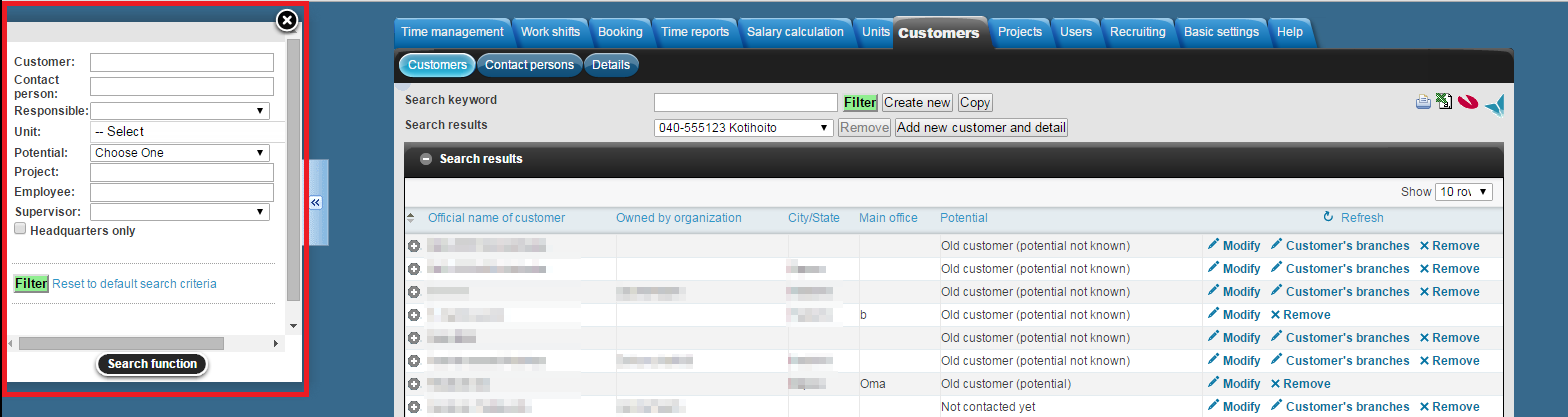
The customers of the company are listed in the search results. The list shows 10 rows by default but that can be changed by changing the "Show" field to the desired amount. The list includes some information about the customers and you can arrange the list by clicking the headings. If you want to view further information about a single customer just click the plus ( ) icon next to the customer name.
You can print or save the customer list in Excel, Visma or Fivaldi by clicking the icons on top-right side of the page.
By pressing the gray circle below "Customers" page button you can hide the upper tab buttons. To return the view to normal, simply press the button again.

Searching a customer
The most simple way to search a certain customer is to use the search field. There you can write any information about the searched customer and clicking "Filter" updates matching customers to the customer list below. If there is only one customer that fits the search criteria its information will be shown on the page automatically.
Another way to search customers is to use the search function leaflet. The leaflet can be accessed by moving your mouse on the arrow marks ( >> ) on the left side of the page. This opens up a window where it is possible to search customers by detailed information.
- Customer name
- Contact person
- Who's responsible
- Unit
Customer's status
"New and existing" -search brings only the customers which are in use.- Project
- Employee
- Supervisor
Adding a customer
Adding a new customer starts with clicking the "Create new"-button next to the keyword search. "Add new customer and detail" creates a new customer with a detail at the same time. If you know that you're going to add a detail to the new customer you're creating, that is a simple way to create both at the same time. Of course you can always add details to customers afterwards. Instructions on how to add them afterwards can be found under the Customers#Adding customer details heading.
When creating a new customer Tuntinetti informs that the official name of the customer and the business id are the only obligatory fields. We advice to enter all the information about the customer that is possible to enter. If you want to fill some information later that is left empty in the creation phase you can always come back and fill in or modify the customer's information by selecting it in the search result list. The customer's information can include among other things:
- Official name of the customer
- Business id
- Additional id
- Transfer id
It is possible to mark the customer as a private customer
To a private customer it is possible to add Birth date, Identity code and Sex- Collegual name
- Billing name
Main office or Payer
Payer is only used when the customer is a private customer. In other cases this is Main office.
In terms of functionality, there is no difference whether it is a private customer or a Company, you can use Main office as payer for both of them when invoicing. But in the case of a private customer, we talk about Payer because the concept of Main office is not actually applicable to a private customer.
- Responsible unit
- Responsible person
- Salary payment dates
- Length of the lunch hour
Miscellaneous information
This information can be shown to the employee who visits the customer in addition to the contact information.- Notes
- Service description
- Attached photo
Addresses
Billing address and street address separately. The street address can be viewed in a map by clicking the map icon .
.- Billing contact person
- Phone number
- Contact e-mail
- Billing e-mail
- Electronic invoicing id
- More settings:
- By default disable bill debt collection
- By default disable bill payment reminder
- Send reports for approval separately for each project
When the customer's information has been entered the changes must be saved by clicking the "Save changes"-button on top of the page. The added customer can be found in the search results and it is able to search it with keyword search.
Remove a customer that has not been in use
A customer that has not been in use can be removed by clicking the Remove button next to the desired customer in the search result list.
Old customers can't be removed, but they can be archived. Instructions on how to archive customers can be found in the Archiving customers guide.
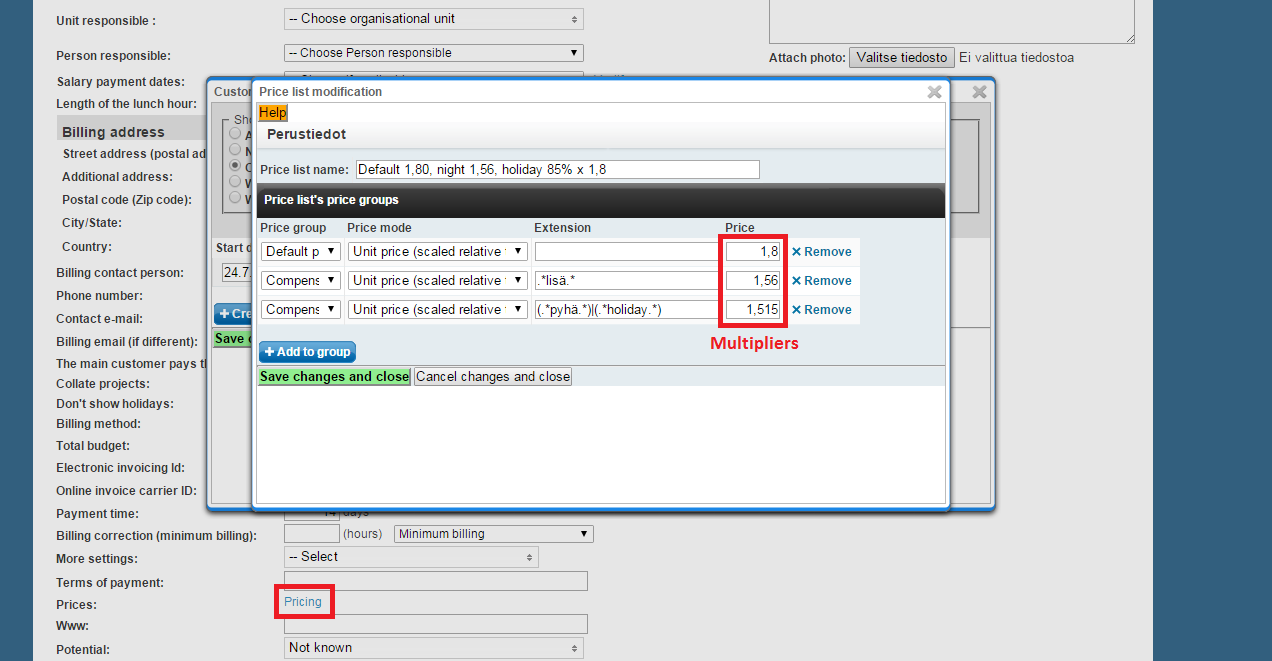
Creating a price list
To modify the pricing settings you must click "Pricing".
A new price list can be created by clicking the "Create pricing"-button. This opens up the price list modification window. There you must add the name of the price list and add price groups that define how the price list works. You can choose how the price group works by selecting the following settings:
- Price group type defines the kind of the price group.
- Price mode defines how the price acts in different situations.
Extension you can use to define the pricing and define price salary types in a certain price group. It uses Regexp-targeting.
Regexp (Regular expression) is a sequence of characters that define a search pattern. You can find many sites where you are able to test regular expressions before adding them in Tuntinetti. More information about regular expressions you can find at wikipedia. https://en.wikipedia.org/wiki/Regular_expression- Price defines the multiplier of the price group.
After adding the price groups you can save the price list by clicking "Save changes and close". This returns you to the pricing settings where you must set the start date of the price list and check the check-box of the price list that is in use. You can also go back to modifying created price lists or remove them. To save the changes that have been made click the "Save changes and close"-button.
Active price lists can be viewed by hovering mouse over the "Pricing"-button.
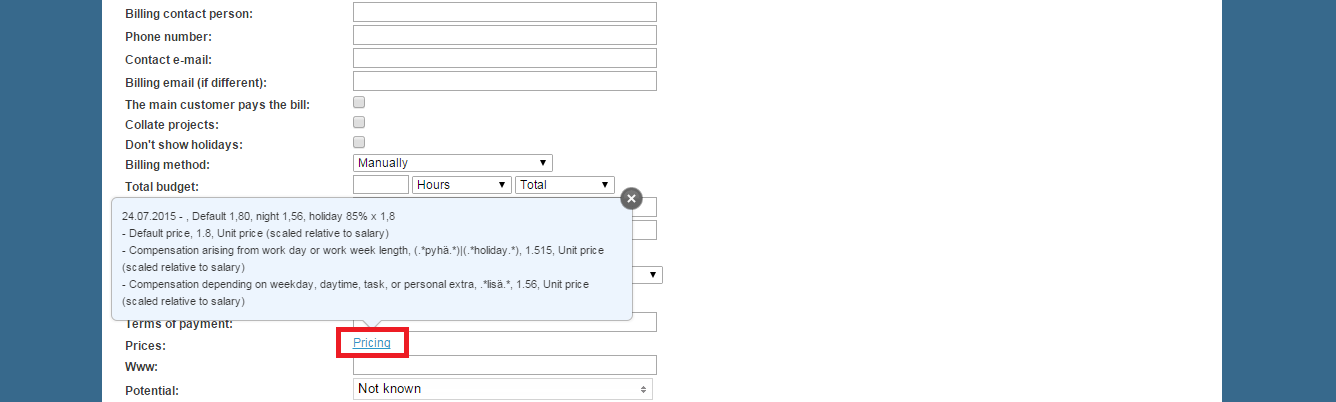
More information about pricing and setting price lists is in the Billing and pricing introduction.
Adding customer details
It is possible to add customer-specific details to customers. The details can contain for example alarms or detailed notes about urgent matters. New details can be added in the Customer details and attachments section.
) sign on the left.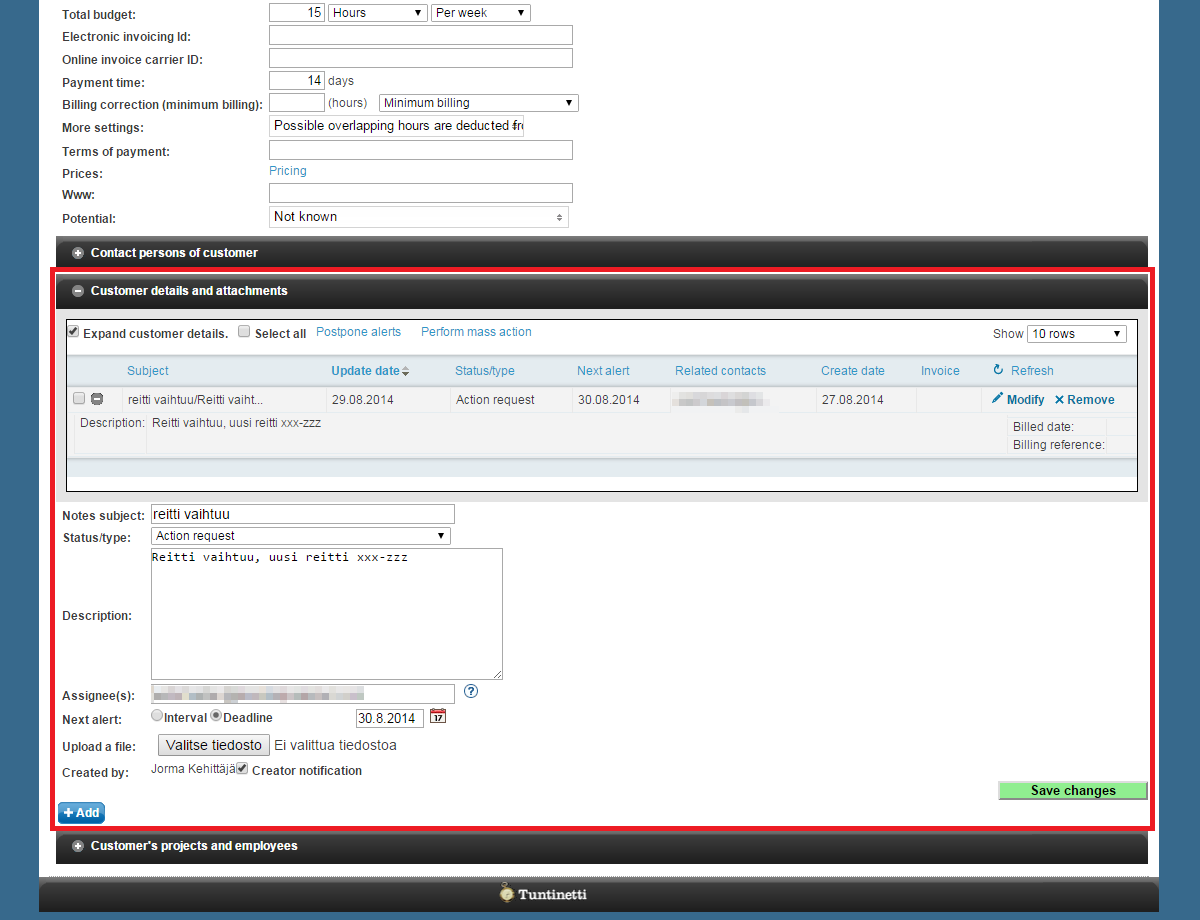
A new detail/note can be added by clicking the "Add"-button in the Customer details and attachments section. Fields for the detail's information open up under the detail list.
- Notes subject
- The subject can be the name of the note or a short description of the note.
- Status/type
- The type of the note defines what kind of note it is.
- Description
- The description includes the note itself that needs to be remembered.
- Additional options
- Here are the following options:
- Ask employee to confirm they have read the attachment when logging in
- Show attachment to employee
- Here are the following options:
- Assignee(s)
- Defines the people that are in charge of the note.
- Next alert
- Defines the date of the next alert. The alert sends an email notification to the people, who are added in the "Assignee(s)" field.
- Upload a file
- A note can have an attachment, which can be added here.
- Creator notification
- If the creator of the notification wants to be notified by any changes to the note, this check-box must be activated.
"Save changes" button saves the added note. New notes can be added after that by clicking the "Add" button again.
Customer basic information
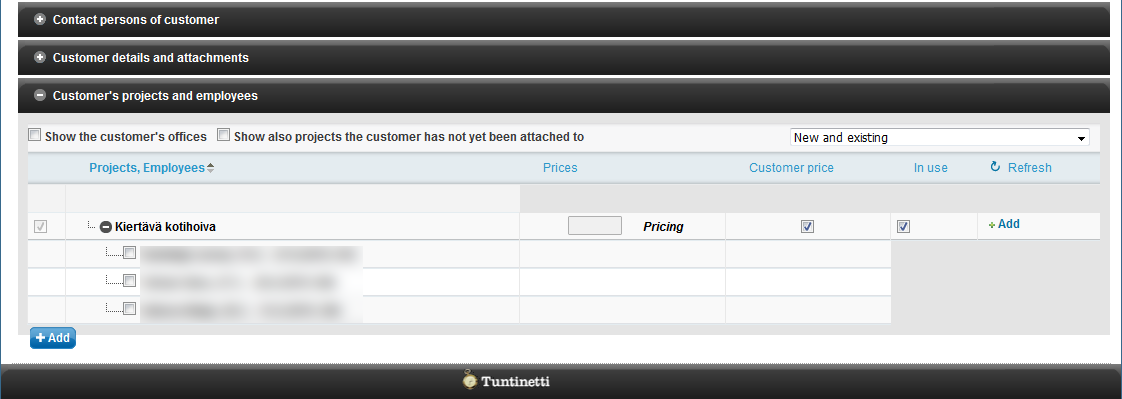
Customer's projects and employees
In this section you can add and delete customer's projects, as well as manage employees of those projects.
It is also possible to set, for example, a separate price list for the project, if customer's price has been turned off from the project. You can also select if the project is even in use for the customer.
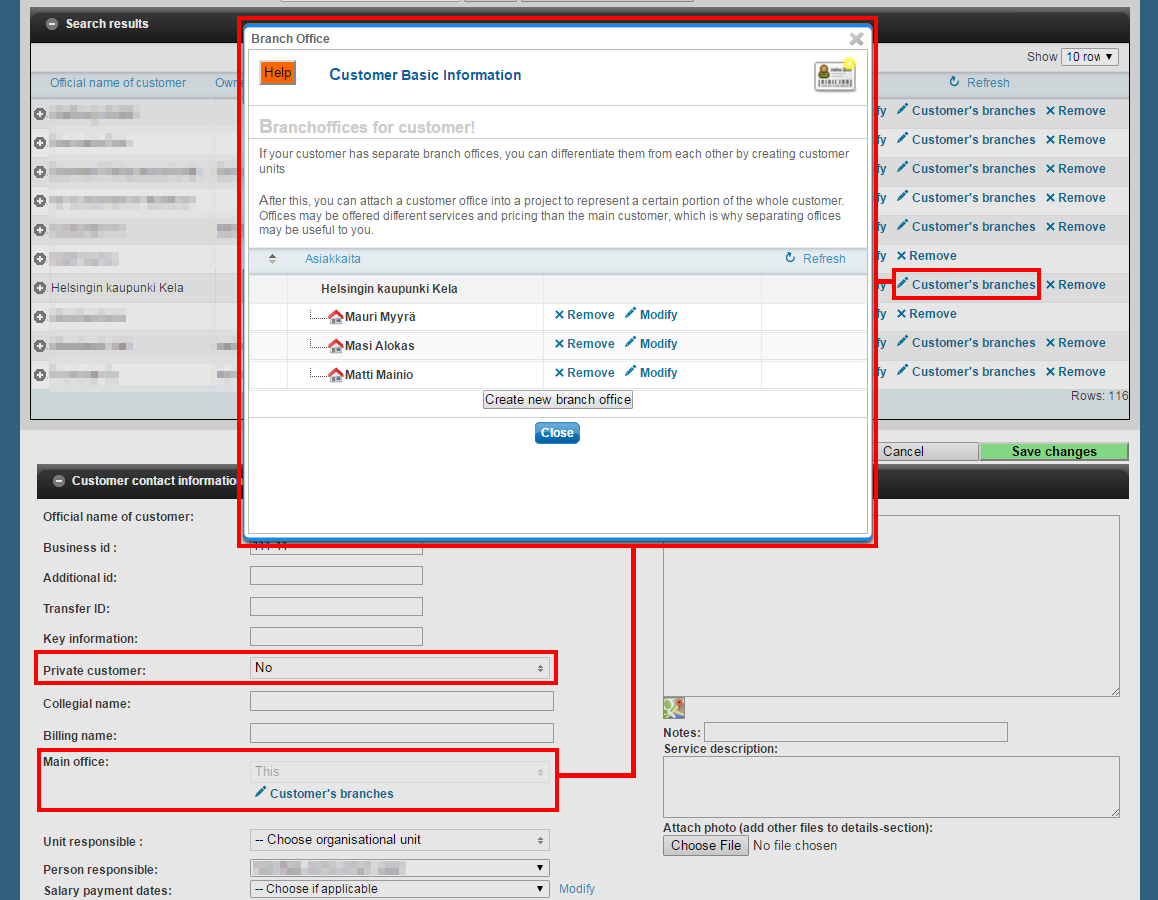
Customer's branches
The branches of a customer can be viewed as a list by clicking the Customer's branches -button. This opens up a Customer basic information -window where the branches are listed. It is also possible to create more branches in this window.
A business customer's Main office must be another business customer, which hasn't got a Main office defined.
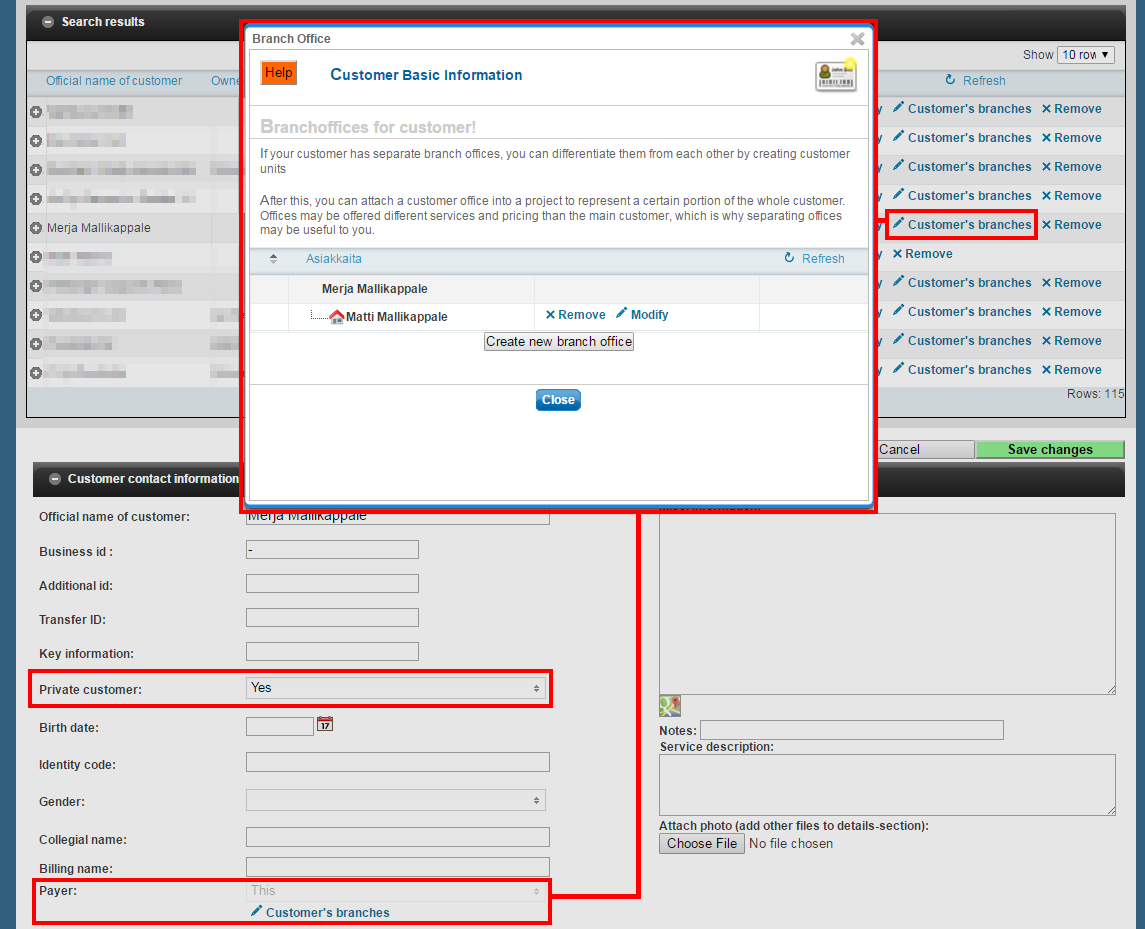
A private customer's Payer can be another private customer, which hasn't got a Payer defined. Or it can be a business customer, which hasn't got a Main office defined.
The Customer's branches button can be found in the Main office section, when the customer is a business customer.
The Customer's branches button can be found in the Payer section, when the customer is a private customer.
Related content
Needing guidance or training? Give us a call +358-(0)9-6898 8221. |
||
Technical support +358-(0)9-6898 8222 tuki@tuntinetti.fi |
Sales services +358-(0)9-6898 8221 myynti@tuntinetti.fi |
|