This manual demonstrates with examples, how to start using Tuntinetti and how it's basic functions work.
...
- Write the start date of the contract. It can also be set from the calendar menu.
- Choose the labour agreement. There are lots of choices but if the suitable one is missing, you can choose (Jos muu niin kerro mikä, voimme lisätä toivomuksesta), this means "If something else, tell us what", and write the labour agreement you want. This way our customer support will add it to the system and inform you about it with email.
- The work time mode fields will be filled based on the labour agreement. They can be modified if needed.
- Next write the salary information. If you don't find it necessary to use the Tuntinetti's payroll functions, the salary mode is enough: bill, hourly salary or monthly salary.
- From the gear -icon you can set additional information for example employee benefits if needed.
...
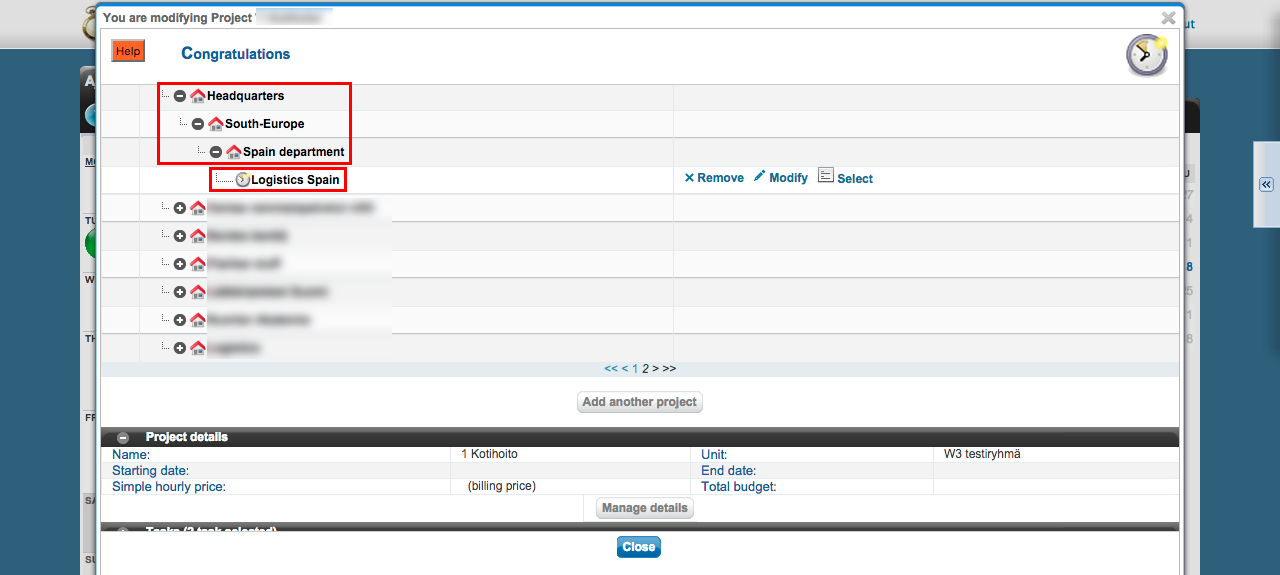
There is a diagram about the company's units. Also the projects below each unit are shown. The projects can be moved from one unit to another by dragging them over unit's names.
Creating a new project
Lets create one example project by clicking Add another project -button.
...
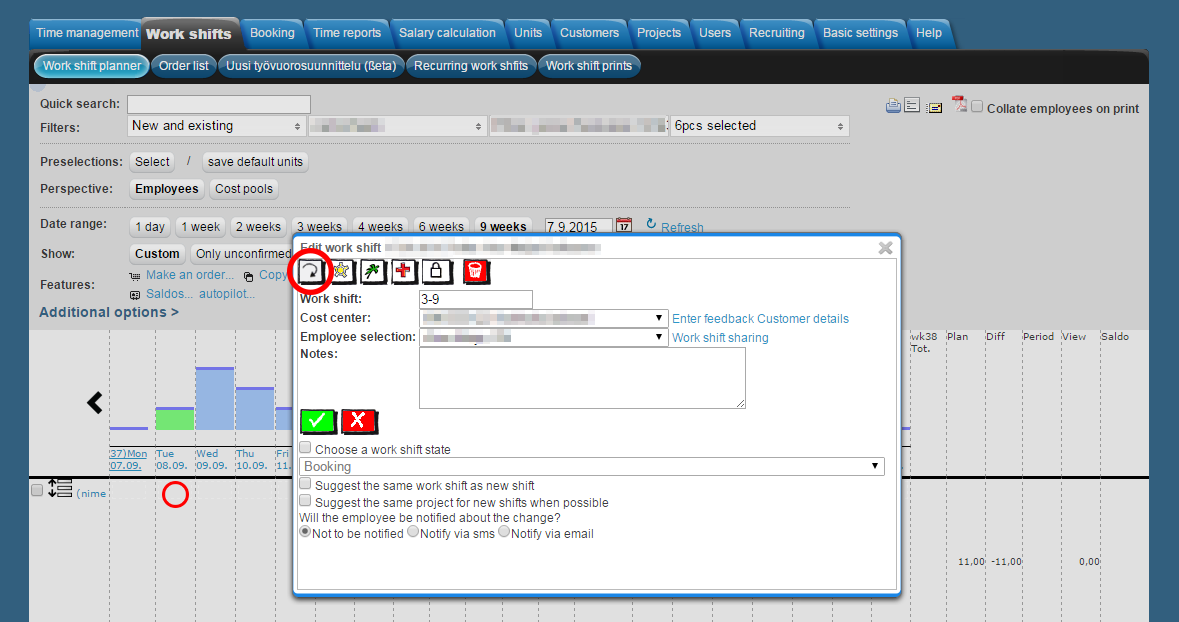
Click the recurrence settings-button in the shift's basic settings. The basic settings view can be entered by clicking a shift in the planning view.
work-shift-recurrence-settings-button
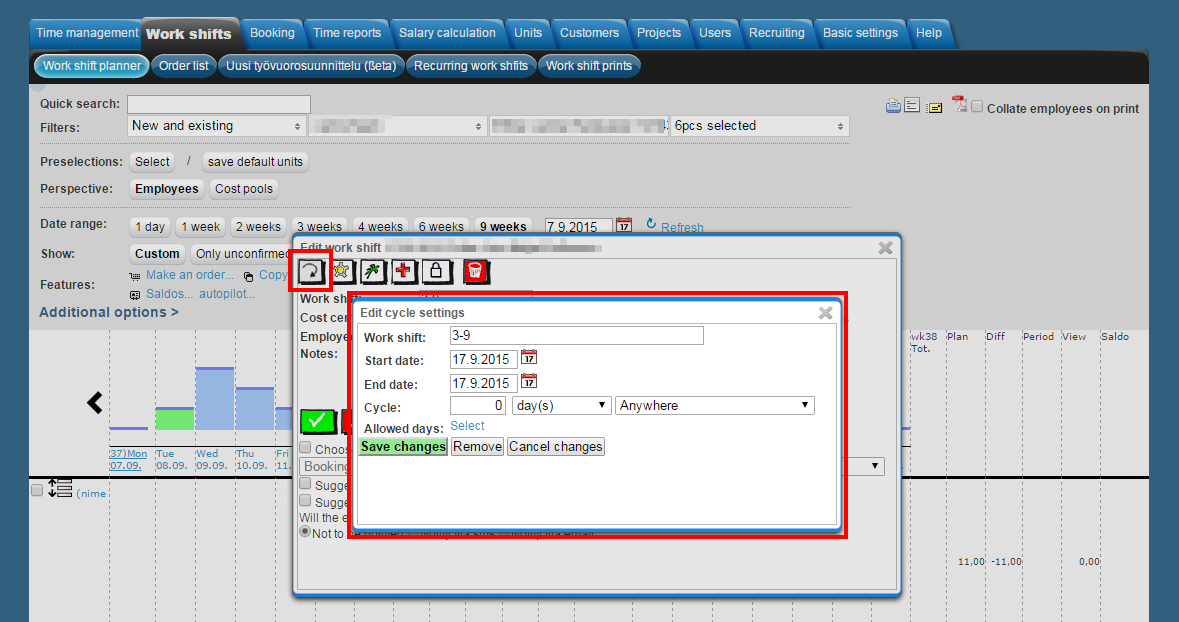
In the cycle setting window you are able to edit the details of the recurring cycles.
- Set the Work shift. You are also able to write down notes in this field, for example "8-16 Remember to lock the doors"
- Set the Start and End dates.
- Set the recurring work shift's cycle in the Cycle-section.
- In the Allowed days-window you are able to set the shift's exact validity.
- For example with this you are able to set that the shift won't be on holidays.
- Save the changes with the Save changes-button
work-shift-recurrence-settings-window
The work shift is visible on the days that it is set to be on.
...
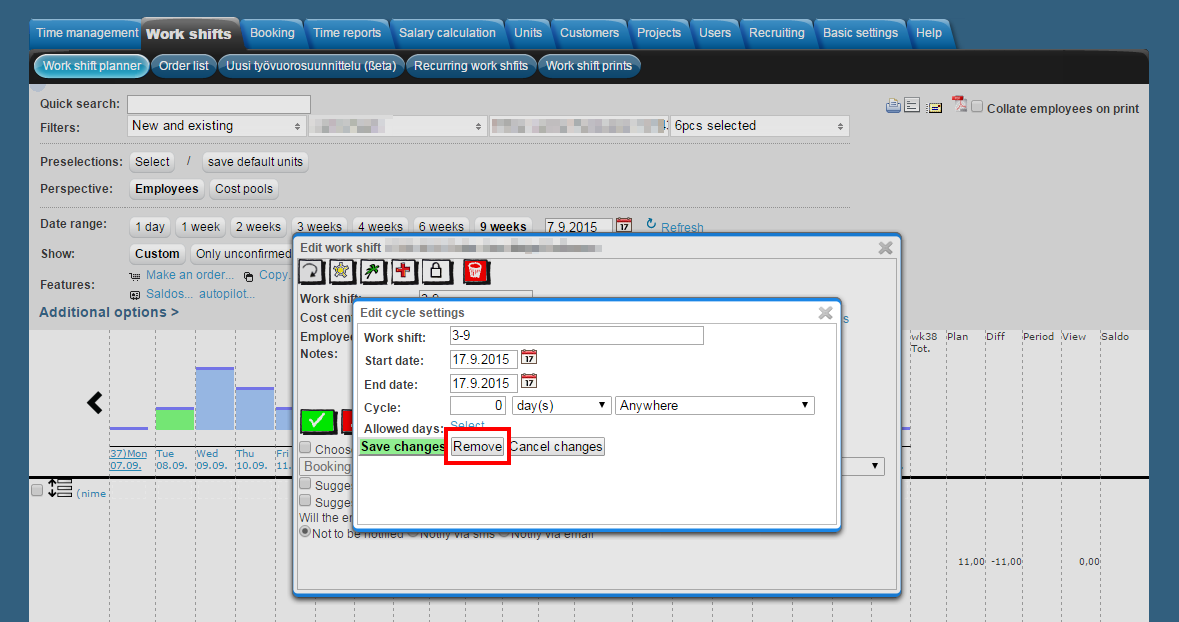
Recurring shifts can all be removed at same time with the "Remove"-button. You can remove them all from a single shift's settings. Any alterations made in a single shift's settings affect in all of the rest shifts of the recurring shift.
work-shift-recurrence-settings-remove
More information about recurring shifts and another way of creating them can be found in the Recurring work shifts-guide.
...
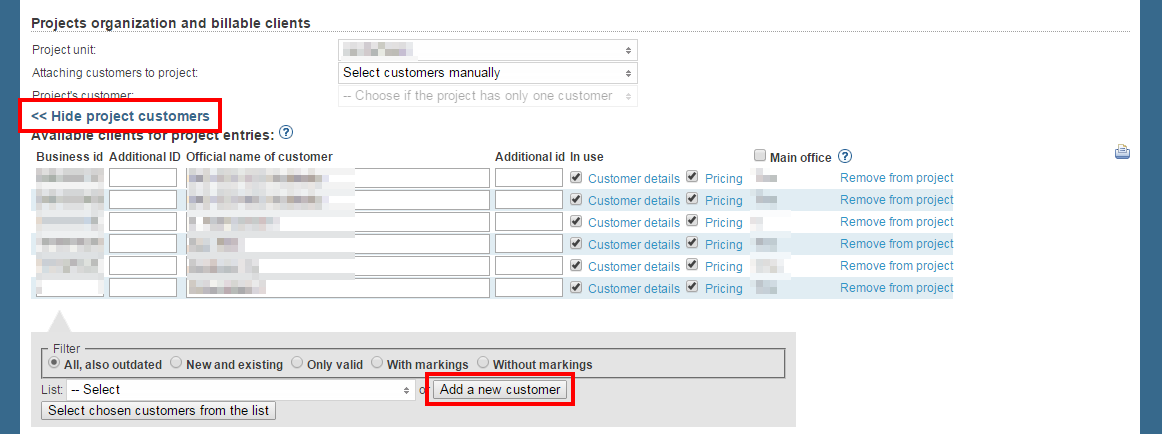
You can find customers and their settings under the "Projects organization and billable clients" -title. Pressing "Customers" -link under the title brings up all the customers that are already attached to the project. If there are no customers added to the project, the link states "Add customers for project".
projects-organization_customers
You can also choose how employees are added to the project.
If the project has only one customer, you can select the customer in the "Project's customer"-field.
You can view all of the project's customers by clicking "Customers" in the "Projects organization and billable clients"-section.
...
You are also able to create a new customer. For this the "Customers"-section should be open.
projects-organization_add-new-customer
...
First you must select a time period and desired employees. When these have been selected the "Select salary sheet" drop-down list will be updated to have the desired salary sheets. There you can choose a certain salary sheet.
...
Before you are able to download payment data, you must enter a payment id in the company's basic information. This can be done in the Basic settings > Company's basic information-tab in the "Payment ID"-section.
payment-id
...
download-payment-data-icon
Examining period reports
...
You can remove a cycle with the "Remove"-button.
work-shift-cycle
Time reports
Searching a time report for payroll
...
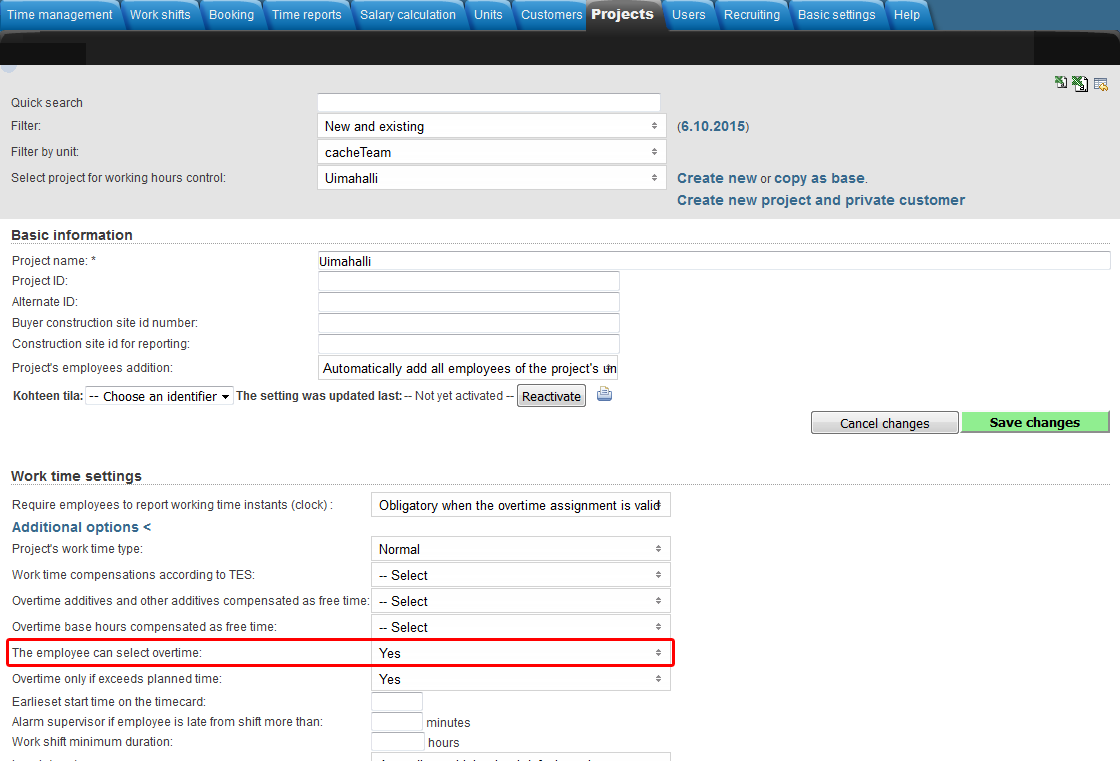
Adding an overtime assignment on the project level takes place in the Projects-tab.
Make sure that you have selected the desired project in the "Select project for working hours control"-drop-downlist.
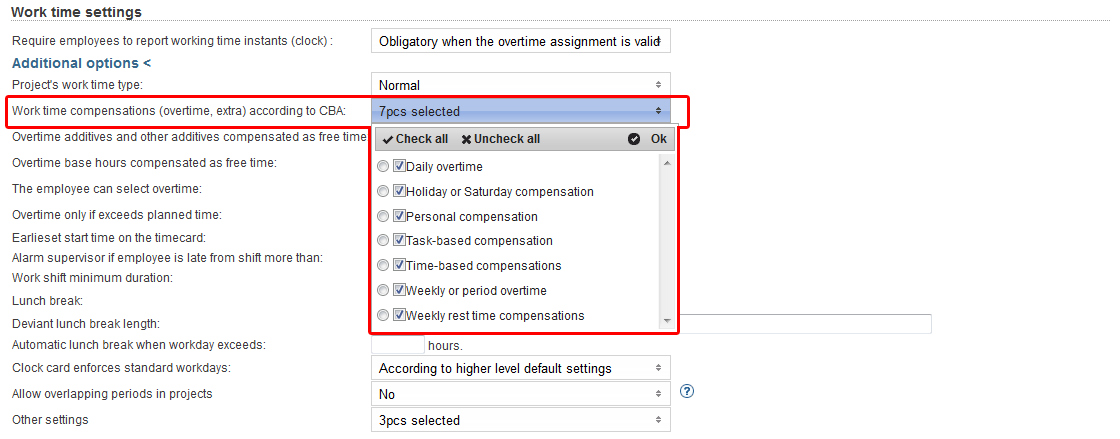
Overtime settings can be found in the "Work time settings"-section and clicking the "Additional options"-button.
You can select from "Work time compensations (overtime, extra) according to CBA" menu which overtimes and extras are going to be itemized in the time reports for payroll (Projects > Work time settings > Additional options).
From "Overtime additives and other additives compensated as free time" and "Overtime base hours compensated as free time" menus you can select which overtimes and extras will be compensated as free time.
A tooltip of each field can be viewed by hovering your mouse over the headings.
You can select "The employee can select overtime", which allows employees to set overtime assignments for themselves.
From "Other settings" menu, you can select the project work time decomposition setting to override possible employee work time decomposition settings.
...
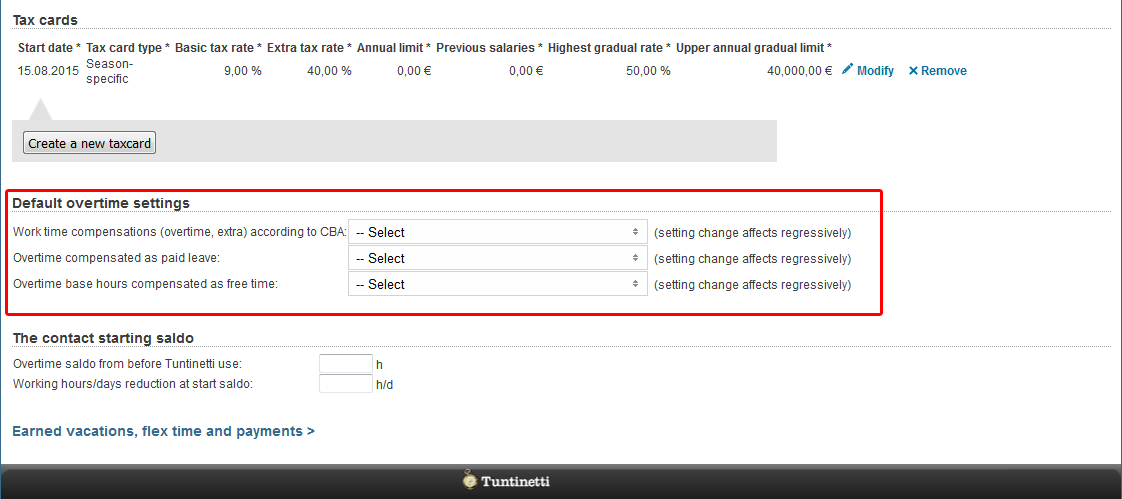
Adding an overtime assignment on the employee level takes place in the Users > Employees-tab.
Make sure that you have selected the desired employee in the "Select user to edit"-drop-downlist.
Default overtime settings can be found in the "Default overtime settings"-section.
You can select from "Work time compensations (overtime, extra) according to CBA" menu which overtimes and extras are going to be itemized in the time reports for payroll (Users > Employees > Default overtime settings).
From "Overtime additives and other additives compensated as free time" and "Overtime base hours compensated as free time" menus you can select which overtimes and extras will be compensated as free time.
A tooltip of each field can be viewed by hovering your mouse over the headings.
More information about overtime assignments can be found in the Overtime assignments-guide.
Pricing
Setting up a pricing for a project
...
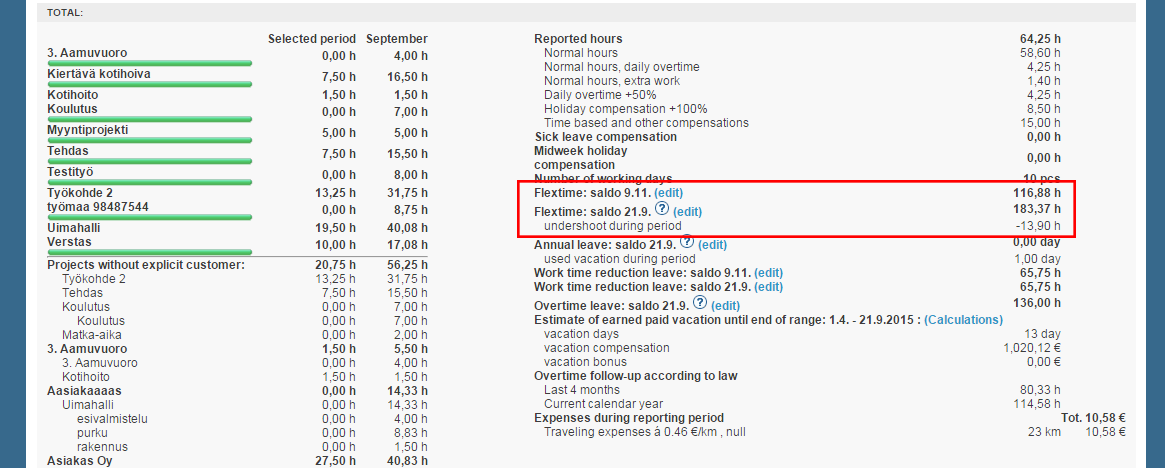
The time report will be updated below the selection windows. In the ending of the report are the balances.
flextime-saldo
Editing the balances
By clicking the "Edit"-button you are able to edit the balances.
...
You can activate a feature by checking the feature's check-box. If you want to deactivate one, just uncheck it.
activate-vacation-calendar-feature
...
