This manual demonstrates with examples, how to start using Tuntinetti and how it's basic functions work.
...
- You may either enter the start date manually or use the calendar menu.
- Choose the labour agreement. There are lots of choices but if the suitable one is missing, you can choose (Jos muu niin kerro mikä, voimme lisätä toivomuksesta), this means "If something else, tell us what", and enter the name of the labour agreement that you need. Our customer support will add it to Tuntinetti and send you email when it's available.
- The work time mode fields will be pre-filled based on the selected labour agreement. They can be modified as needed.
- Next you can enter the salary information. If you don't find it necessary to use the Tuntinetti's payroll functions, it's sufficient to fill the Salary mode -field (bill / hourly salary / monthly salary).
- From the gear -icon you can set additional information as needed, such as employee benefits.
...
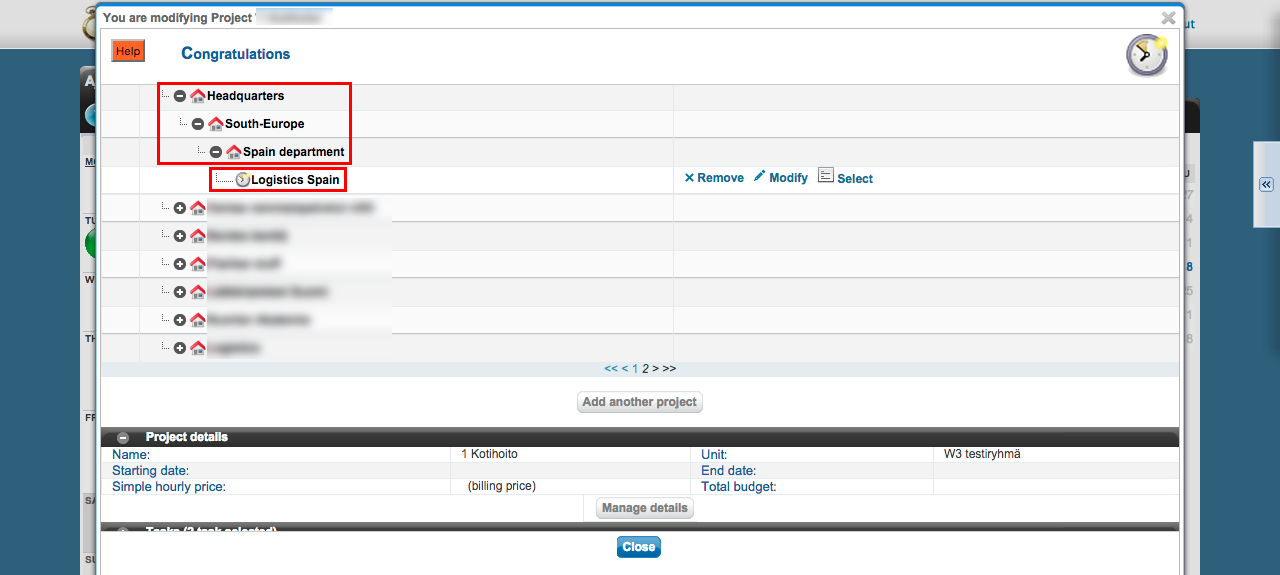
On top of the wizard there is a diagram about the company's units. It also shows the projects below each unit. You can move the projects from one unit to another simply by dragging them.
Creating a new project
Lets create one example project by clicking Add another project -button.
...
Employees to project -wizard
From the list at on this page you can choose employees to a project. The list is structured based on the units.
By checking the checkboxes check boxes you are able to choose the wanted correct employees for the project.
By checking the checkbox check box on the right side you will give the employee a right authority to enter the whole project's employee's hourshours for every employee in the project. This is useful for an employee that has a team leader role.
...
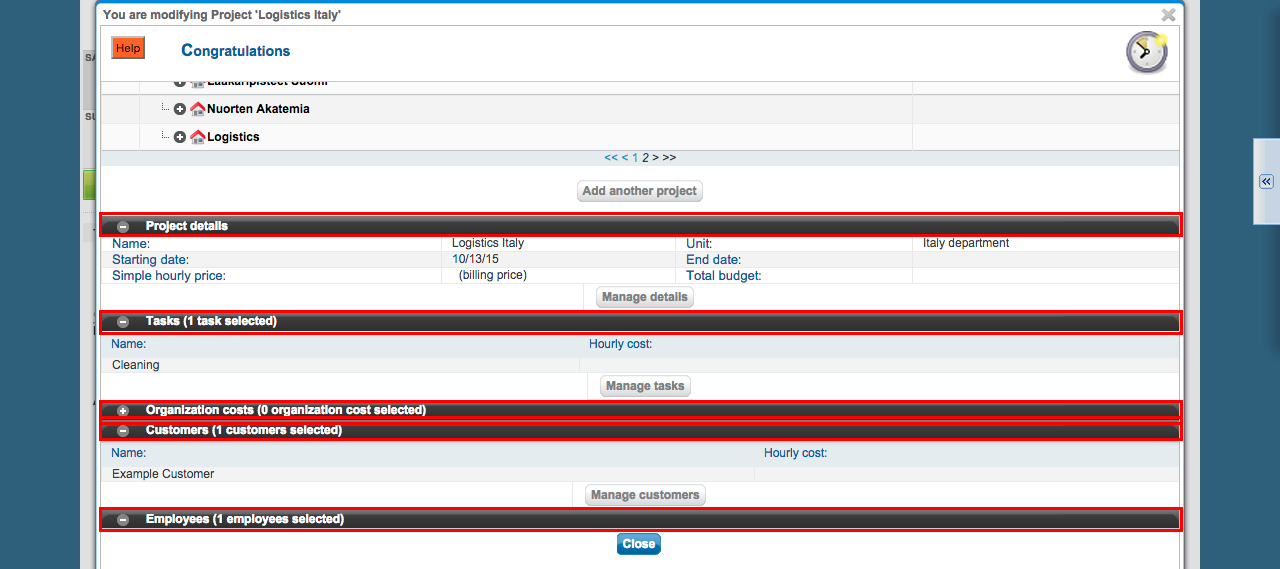
By clicking the sub header bars you are able to see the summary of each section.
The structure of Tuntinetti user interface
Tuntinetti is organised by themes as sections under tabs.
The program contains lots of contenthas many features, so the tabs are separated with further divided to sub tabs.
Users
At the employees tab you are able to handle user's settings. There you are able to may create new users and modify or remove existing ones.
...
The grey area has a search fieldfields, where you can select the employee who's whose information is shown below at in the white area.
Lets create a new user by clicking the Create new user -button.
The white area is now cleared so you can write enter information about the new user's information.
Tuntinetti will often give gives you notifications to on the top of the page about using Tuntinetti properlywhenever there is an issue you should know about. Now the notification tells you that the new user needs at least name, contact information and possible employee contract history.
...
When the user has a name saved you are able to add skills to him. The skills may represent the user's ability in different jobs or for example language skillsmore general skills, such as language proficiency. By adding skills you can make the employee placing process easierit easier to place the employees to suitable tasks.
Next click Employee skills -button.
...
The notes contain notes about the user. They can be for example notices or repeating reminders about the user. The notices are visible and the reminders will go be sent to the persons that are marked in the email field (typically the supervisors).
...
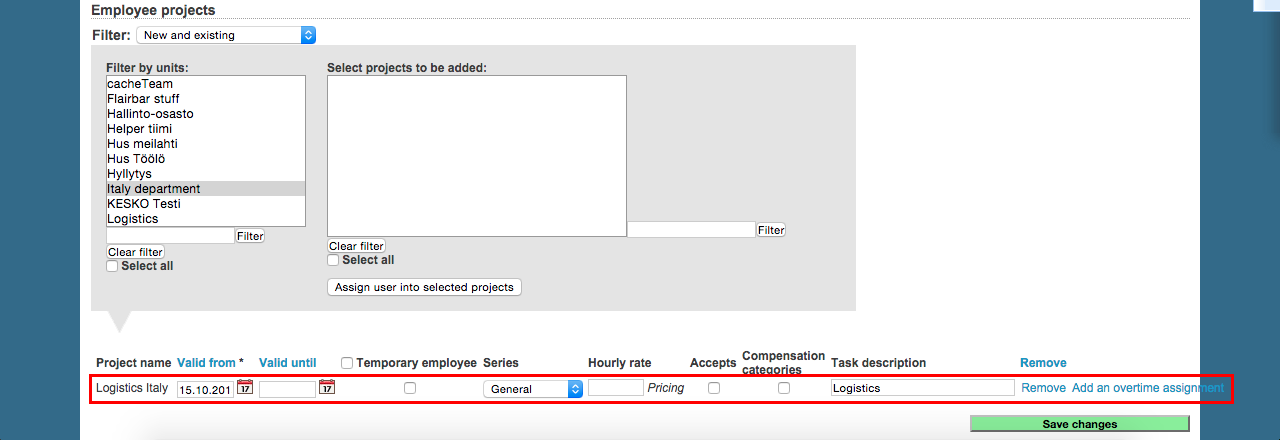
Here you can browse projects one by onein different units. The left box contains units and the right box contains the projects inside the chosen unit. You are able to can make multiple choices with using the shift- and ctrl -buttons.
The employee will be placed to a project by clicking the Assign user into selected projects -button.
There is a new row for Below the selection boxes new rows appears for each of the employee's new projects below. Fill in the needed information.
The employee is missing the information about tax card. By clicking the Create a new tax card -button you a form will open a form to fill in the information.
Fill the form and save the information.
Click to add information about the employees tax card. Remember click save after entering required info.
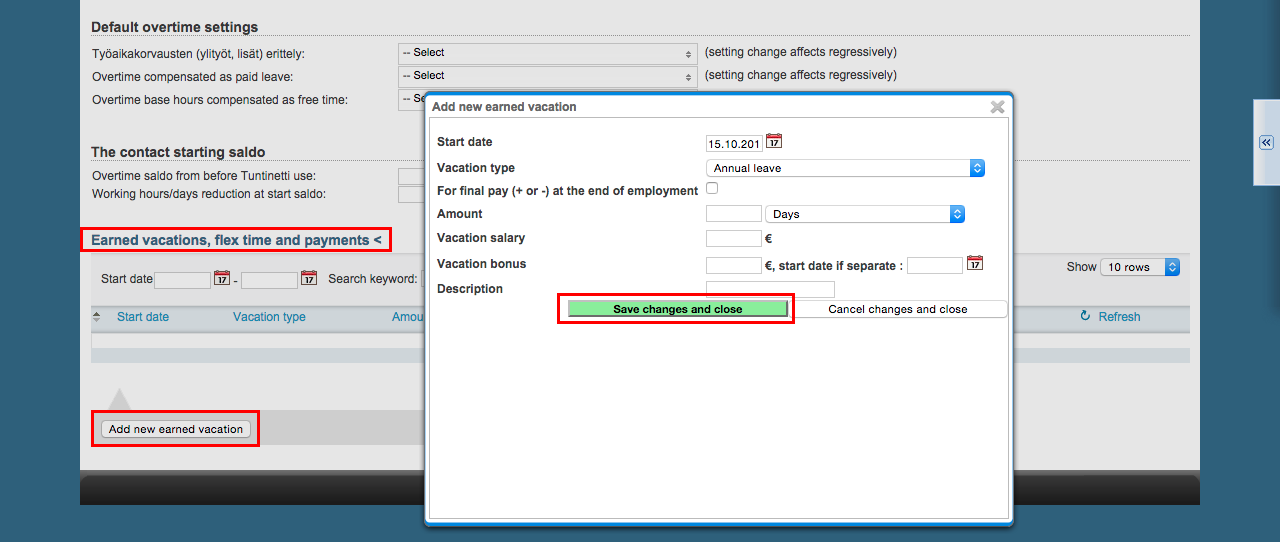
Next let's click the Earned vacations, flex time and payments > -button. The vacations that the employee has earned will be entered here. (Notice: that the It's recommended to also use this section for any hour balance changes after the start balance, are recommended to do here as well, because that way they will be saved to history. That way the balance change history can be reviewed later from this same section).
Lets create a vacation as an example.
After filling the information you will need to remember Remember to save the changes after filling the information.
Next Finally lets send an invitation to the user. You are able to get to can send the invitation by clicking the mail - icon next to the Email address field.
Choose to send the user ID in the invitation and send the invitation by clicking the Perform action -button.
...
If the project has only one customer, you can select the customer in the "Project's customer"-field.
You can view all of the project's customers by clicking "Customers" in the "Projects organization and billable clients"-section.
...
First you must select a time period and desired employees. When these have been selected the "Select salary sheet" drop-down list will be updated to have the desired salary sheets. There you can choose a certain salary sheet.
...
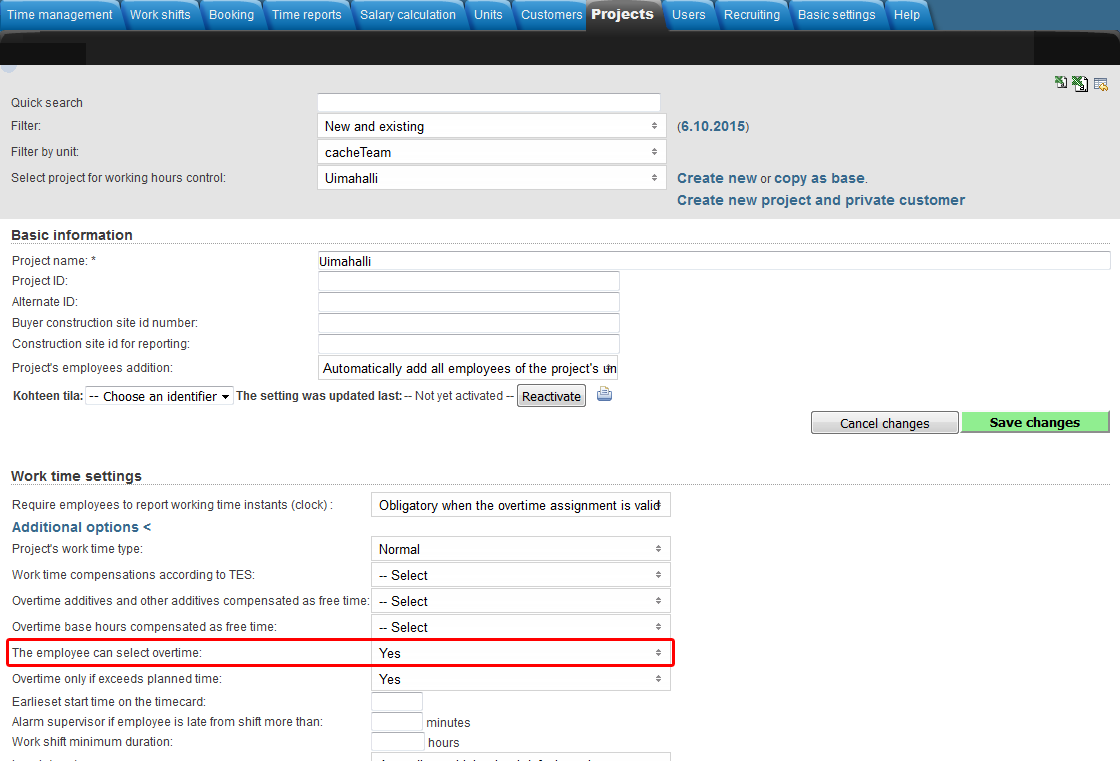
Adding an overtime assignment on the project level takes place in the Projects-tab.
Make sure that you have selected the desired project in the "Select project for working hours control"-drop-downlist.
Overtime settings can be found in the "Work time settings"-section and clicking the "Additional options"-button.
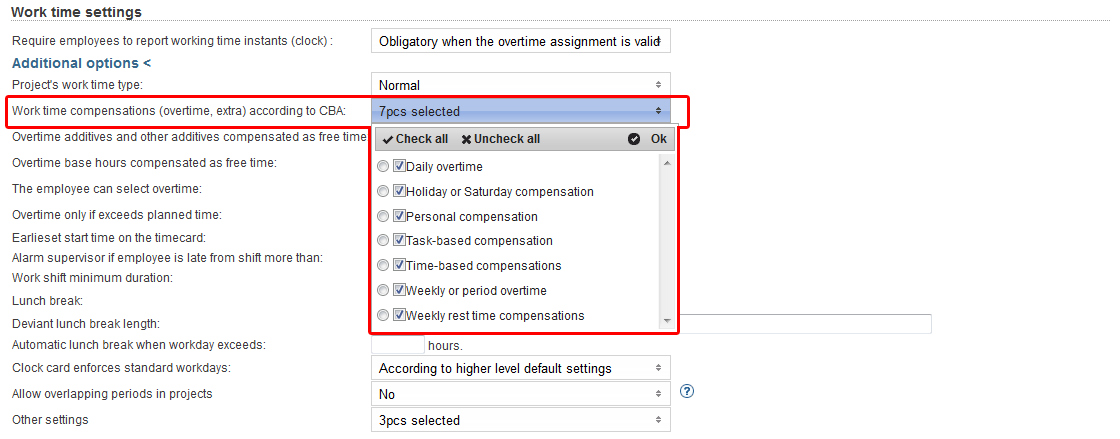
You can select from "Work time compensations (overtime, extra) according to CBA" menu which overtimes and extras are going to be itemized in the time reports for payroll (Projects > Work time settings > Additional options).
From "Overtime additives and other additives compensated as free time" and "Overtime base hours compensated as free time" menus you can select which overtimes and extras will be compensated as free time.
A tooltip of each field can be viewed by hovering your mouse over the headings.
You can select "The employee can select overtime", which allows employees to set overtime assignments for themselves.
From "Other settings" menu, you can select the project work time decomposition setting to override possible employee work time decomposition settings.
...
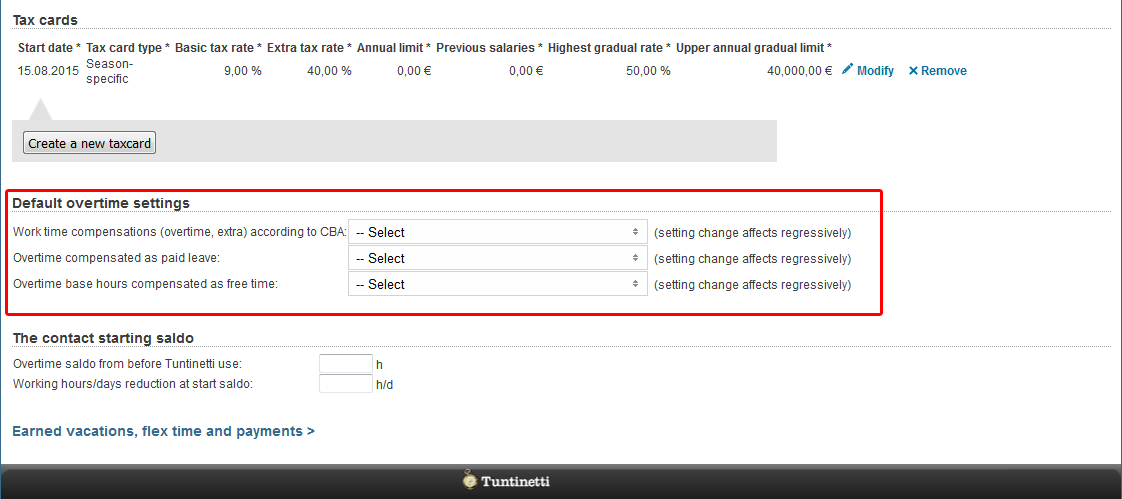
Adding an overtime assignment on the employee level takes place in the Users > Employees-tab.
Make sure that you have selected the desired employee in the "Select user to edit"-drop-downlist.
Default overtime settings can be found in the "Default overtime settings"-section.
You can select from "Work time compensations (overtime, extra) according to CBA" menu which overtimes and extras are going to be itemized in the time reports for payroll (Users > Employees > Default overtime settings).
From "Overtime additives and other additives compensated as free time" and "Overtime base hours compensated as free time" menus you can select which overtimes and extras will be compensated as free time.
A tooltip of each field can be viewed by hovering your mouse over the headings.
More information about overtime assignments can be found in the Overtime assignments-guide.
Pricing
Setting up a pricing for a project
...
