This manual demonstrates with examples, how to start using Tuntinetti and how it's basic functions work.
...
- Write the start date of the contract. It can also be set from the calendar menu.
- Choose the labour agreement. There are lots of choices but if the suitable one is missing, you can choose (Jos muu niin kerro mikä, voimme lisätä toivomuksesta), this means "If something else, tell us what", and write the labour agreement you want. This way our customer support will add it to the system and inform you about it with email.
- The work time mode fields will be filled based on the labour agreement. They can be modified if needed.
- Next write the salary information. If you don't find it necessary to use the Tuntinetti's payroll functions, the salary mode is enough: bill, hourly salary or monthly salary.
- From the gear -icon you can set additional information for example employee benefits if needed.
...
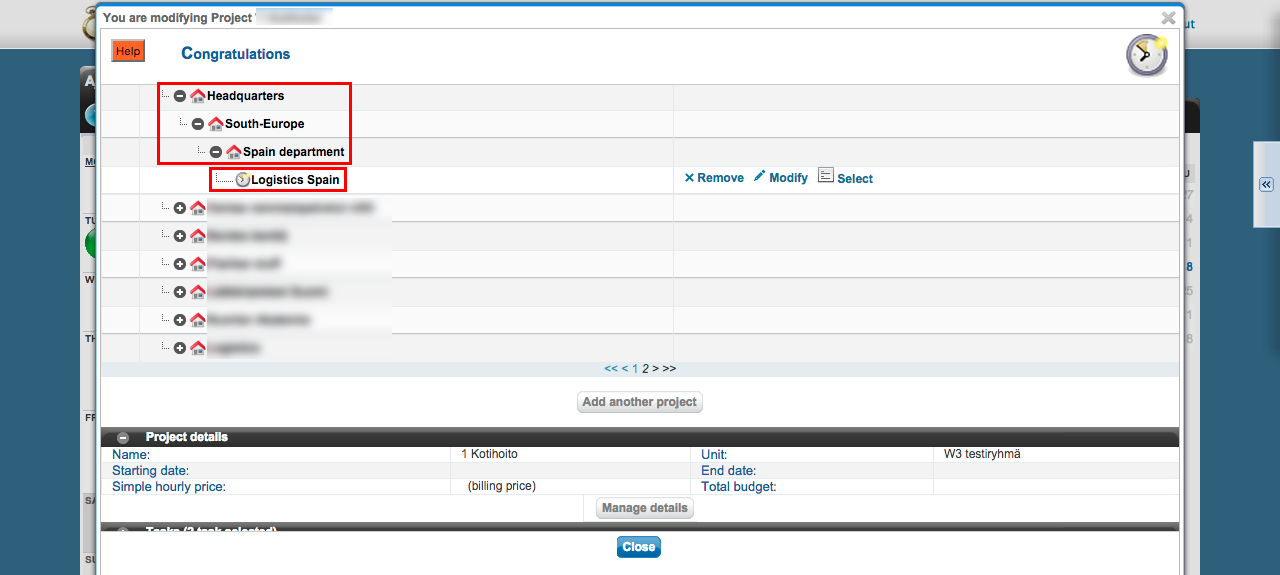
There is a diagram about the company's units. Also the projects below each unit are shown. The projects can be moved from one unit to another by dragging them over unit's names.
Creating a new project
Lets create one example project by clicking Add another project -button.
...
If the project has only one customer, you can select the customer in the "Project's customer"-field.
You can view all of the project's customers by clicking "Customers" in the "Projects organization and billable clients"-section.
...
First you must select a time period and desired employees. When these have been selected the "Select salary sheet" drop-down list will be updated to have the desired salary sheets. There you can choose a certain salary sheet.
...
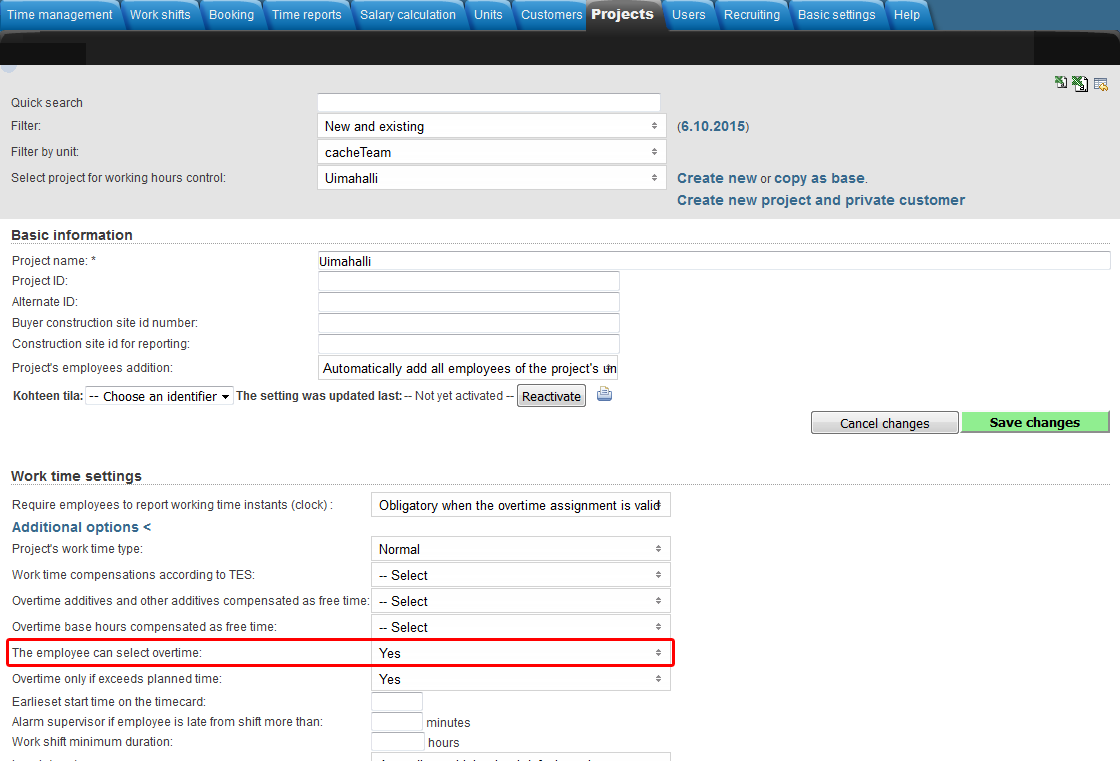
Adding an overtime assignment on the project level takes place in the Projects-tab.
Make sure that you have selected the desired project in the "Select project for working hours control"-drop-downlist.
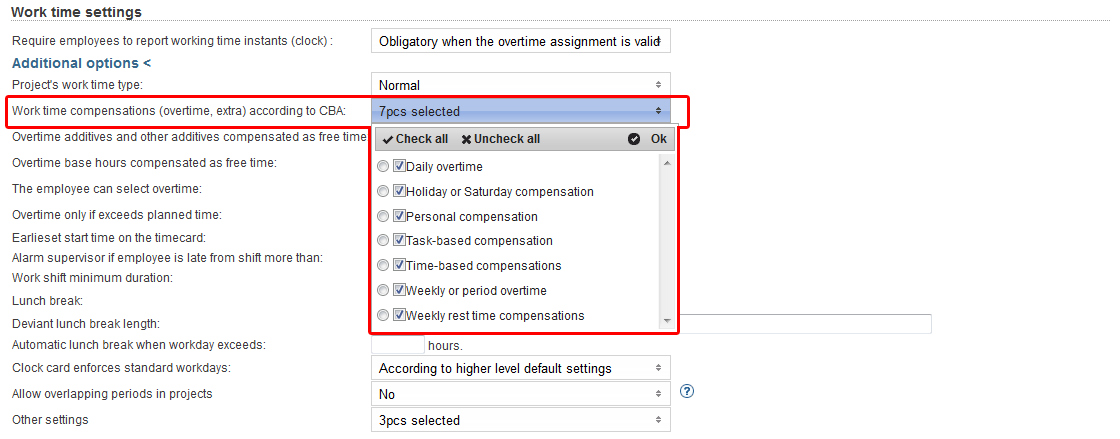
Overtime settings can be found in the "Work time settings"-section and clicking the "Additional options"-button.
You can select from "Work time compensations (overtime, extra) according to CBA" menu which overtimes and extras are going to be itemized in the time reports for payroll (Projects > Work time settings > Additional options).
From "Overtime additives and other additives compensated as free time" and "Overtime base hours compensated as free time" menus you can select which overtimes and extras will be compensated as free time.
A tooltip of each field can be viewed by hovering your mouse over the headings.
You can select "The employee can select overtime", which allows employees to set overtime assignments for themselves.
From "Other settings" menu, you can select the project work time decomposition setting to override possible employee work time decomposition settings.
...
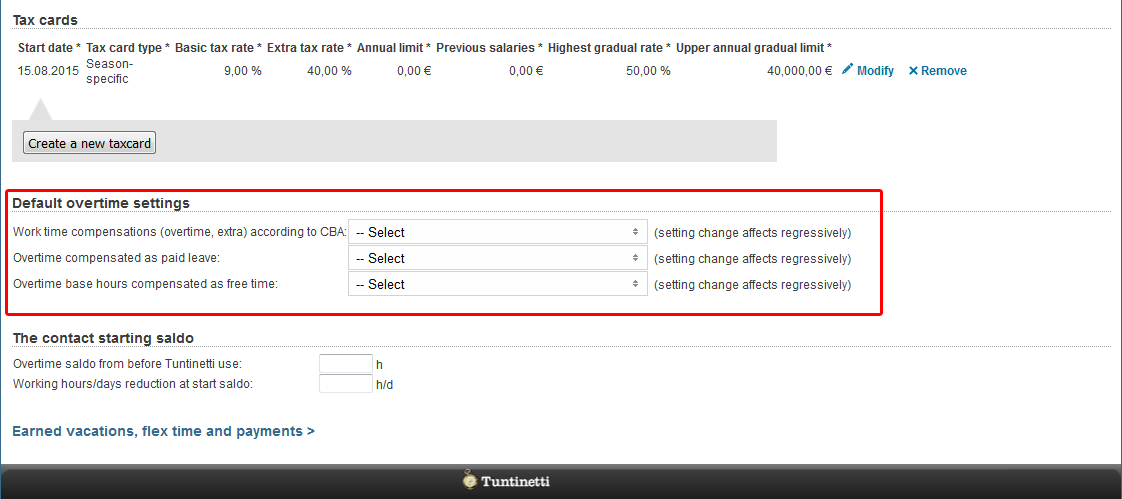
Adding an overtime assignment on the employee level takes place in the Users > Employees-tab.
Make sure that you have selected the desired employee in the "Select user to edit"-drop-downlist.
Default overtime settings can be found in the "Default overtime settings"-section.
You can select from "Work time compensations (overtime, extra) according to CBA" menu which overtimes and extras are going to be itemized in the time reports for payroll (Users > Employees > Default overtime settings).
From "Overtime additives and other additives compensated as free time" and "Overtime base hours compensated as free time" menus you can select which overtimes and extras will be compensated as free time.
A tooltip of each field can be viewed by hovering your mouse over the headings.
More information about overtime assignments can be found in the Overtime assignments-guide.
Pricing
Setting up a pricing for a project
...
Tuntinetti's paid features
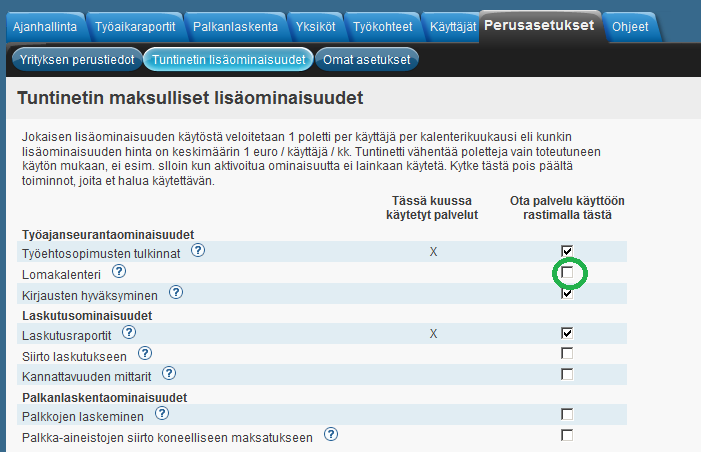
Tuntinetin maksulliset lisäominaisuudet monipuolistavat ohjelman käyttöä ajanhallinnassa, laskutuksessa ja työvuorosuunnittelussa. Jos sinulla on pääkäyttäjän valtuudet, voit valita, mitkä lisäominaisuudet haluat ottaa käyttöön tai poistaa käytöstä.
Lisäominaisuuksien hallinta tapahtuu Perusasetukset-välilehdellä. Siirry sivulle Tuntinetin lisäominaisuudet.
Sivulla näet listan saatavilla olevista lisäominaisuuksista.
Toinen sarake kertoo, mitä ominaisuuksia on kuluvan kuukauden aikana käytetty.
Voit ottaa haluamasi ominaisuuden käyttöön lisäämällä valinnan checkbox-ruutuun. Vastaavasti käytön lopettaminen tapahtuu poistamalla valinta.
Huomaa, että joillakin ominaisuuksilla on keksinäisiä riippuvuuksia.
Esimerkiksi Siirto laskutukseen -ominaisuus edellyttää, että myös Laskutusraportit-ominaisuus on käytössä.
Vahvista ominaisuuden käyttöönotto tallentamalla muutokset "Tallenna"-painikkeella.
Lisäominaisuuksien käytöstä maksetaan poleteilla. Jokaisesta lisäominaisuudesta veloitetaan yksi poletti per palvelun käyttäjä per kalenteri kuukausi.
Sivun oikeassa laidassa olevasta taulukosta näet tämänhetkisen polettisaldosi.
Kun poletit ovat loppumassa tai koeaika päättymässä, taulukon alla näkyy "Osta lisää poletteja" -painike, jonka kautta pääset ostamaan lisää poletteja.
Sivun alalaidassa olevan tapahtumahistorian avulla voit seurata, kuka käyttäjistänne on mitäkin lisäominaisuutta milloinkin käyttänyt.
Lisäominaisuudet listattuna sekä Tuntinetin lisäominaisuudet-välilehden toimintoja käydään tarkemmin läpi Tuntinetin lisäominaisuudet-ohjeessa.
...
The paid features of Tuntinetti diversifies the usage of the program concerning time management, billing and work shift planning. If you have the manager rights, you can select which additional features are activated or removed.
The management of the additional features can be done in the Basic settings > Tuntinetti's paid features-tab.
The page contains a list of the features that are available.
When you hover on a question mark with your mouse, you can read a tip.
The second column has a mark in it, if the feature has been used in the present month.
You can activate a feature by checking the feature's check-box. If you want to deactivate one, just uncheck it.
Confirm the activations by saving your changes with the "Save changes"-button in the bottom.
Tuntinetti charges only by the features used not when a feature is activated but not used. Every feature costs one coin per service uder per month.
You can see your coin balance in the right part of the page.
If your coins are about to run out, there will be a "Buy more coins"-button under the calculations.
You can also monitor the usage of features in the bottom of the page in the "Browse account logs"-section.
More information about Tuntinetti's paid features can be found in the Tuntinetti's paid features-guide
Training and remote training about using Tuntinetti
Learn to use Tuntinetti in a couple of days! Tuntinetti offers training for basic users to main users. Contact Tuntinetti sales (+358-(0)9-6898 8221) and we'll tell you more.
By purchasing a training session, you ensure your know-how. Time will not be wasted, work hours will be effective and you can set up your settings right.
Tuntinetti haltuun parissa päivässä! Tuntinetti tarjoaa koulutusta peruskäyttäjistä pääkäyttäjiin. Ota yhteys Tuntinetin myyntiin (+358-(0)9-6898 8221) ja kerromme lisää.
Koulutuksen ostamalla varmistatte oman osaamisenne. Aikaa ei kulu hukkaan, työajan käyttö on tehokasta ja osaatte laittaa asetuksenne oikein.
Kouluttajamme tulee luoksenne yhdeksi tai useammaksi kokonaiseksi työpäiväksi ja huolehtii, että pääkäyttäjänne oppivat Tuntinetin kaikki toiminnot.
Asiakaspalvelun kautta voi kysyä lisätietoja helposti sähköpostilla: asiakaspalvelu@tuntinetti.fi
Lähikoulutuksen lisäksi Tuntinetti tarjoaa etäkoulutusta webinaarien muodossa internetin välityksellä.
Järjestämme säännöllisesti asiakkaiden toivomia webinareja ajankohtaisista aiheista. Webinarit on suunniteltu niin, että ne palvelevat sekä Tuntinetin aloittelijoita ja harvoin muutoksia tekeviä, että säännöllisesti järjestelmää käyttäviä harjaantuneita käyttäjiä.
Webinaareihin voit ilmoittautua täällä: Ilmoittaudu Tuntinetin Webinaareihin.
