This manual demonstrates with examples, how to start using Tuntinetti and how it's basic functions work.
...
- Write the start date of the contract. It can also be set from the calendar menu.
- Choose the labour agreement. There are lots of choices but if the suitable one is missing, you can choose (Jos muu niin kerro mikä, voimme lisätä toivomuksesta), this means "If something else, tell us what", and write the labour agreement you want. This way our customer support will add it to the system and inform you about it with email.
- The work time mode fields will be filled based on the labour agreement. They can be modified if needed.
- Next write the salary information. If you don't find it necessary to use the Tuntinetti's payroll functions, the salary mode is enough: bill, hourly salary or monthly salary.
- From the gear -icon you can set additional information for example employee benefits if needed.
...
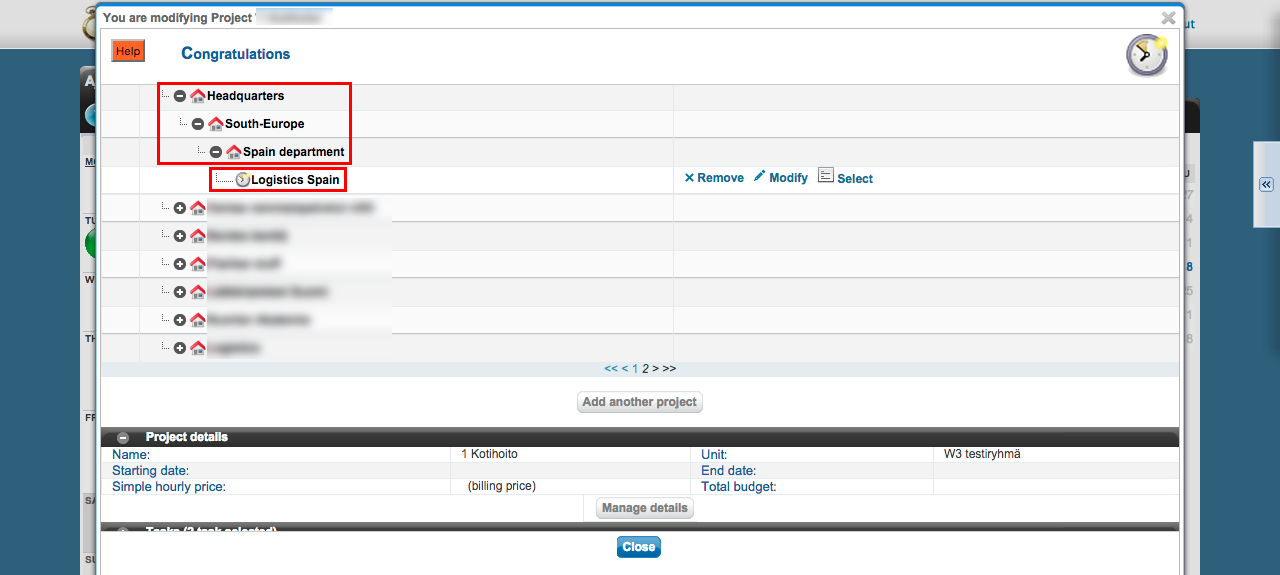
There is a diagram about the company's units. Also the projects below each unit are shown. The projects can be moved from one unit to another by dragging them over unit's names.
Creating a new project
Lets create one example project by clicking Add another project -button.
...
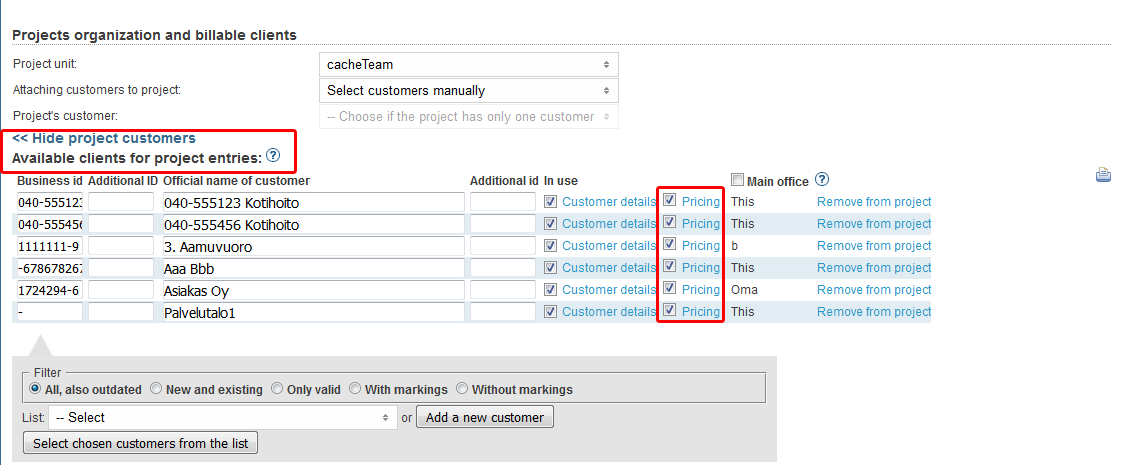
If the project has only one customer, you can select the customer in the "Project's customer"-field.
You can view all of the project's customers by clicking "Customers" in the "Projects organization and billable clients"-section.
...
First you must select a time period and desired employees. When these have been selected the "Select salary sheet" drop-down list will be updated to have the desired salary sheets. There you can choose a certain salary sheet.
...
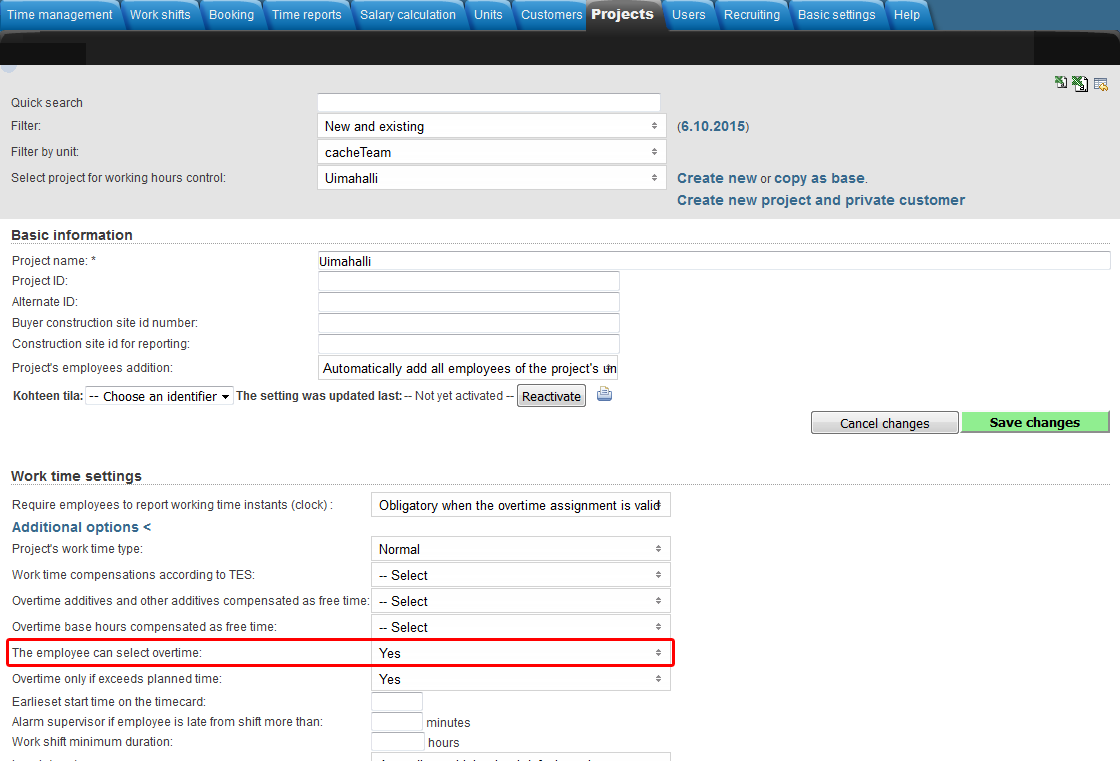
Adding an overtime assignment on the project level takes place in the Projects-tab.
Make sure that you have selected the desired project in the "Select project for working hours control"-drop-downlist.
Overtime settings can be found in the "Work time settings"-section and clicking the "Additional options"-button.
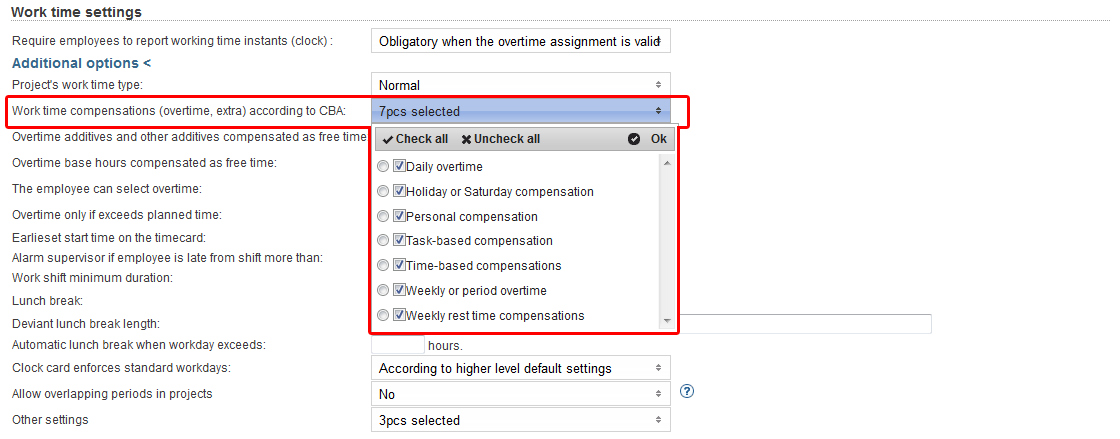
You can select from "Work time compensations (overtime, extra) according to CBA" menu which overtimes and extras are going to be itemized in the time reports for payroll (Projects > Work time settings > Additional options).
From "Overtime additives and other additives compensated as free time" and "Overtime base hours compensated as free time" menus you can select which overtimes and extras will be compensated as free time.
A tooltip of each field can be viewed by hovering your mouse over the headings.
You can select "The employee can select overtime", which allows employees to set overtime assignments for themselves.
From "Other settings" menu, you can select the project work time decomposition setting to override possible employee work time decomposition settings.
...
Adding an overtime assignment on the employee level takes place in the Users > Employees-tab.
Make sure that you have selected the desired employee in the "Select user to edit"-drop-downlist.
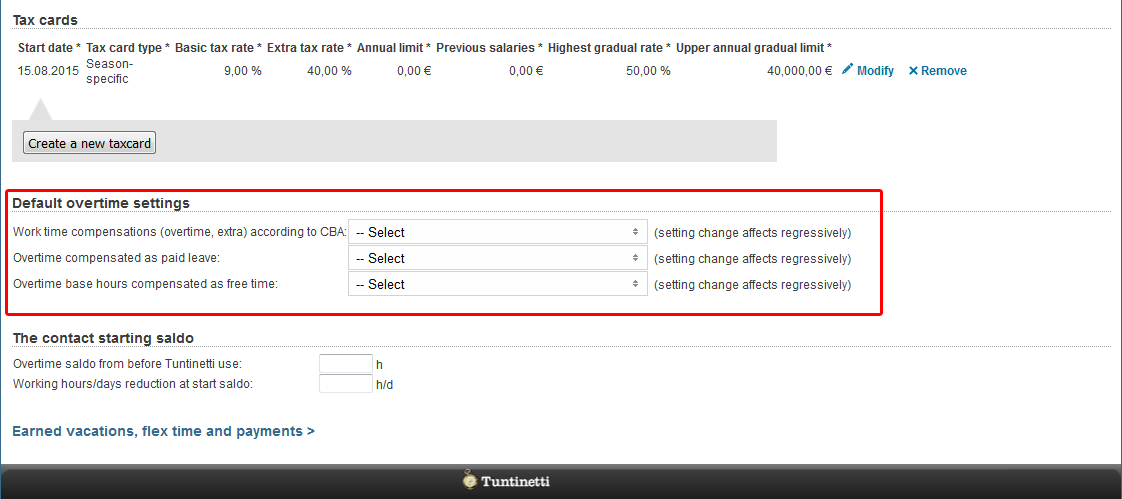
Default overtime settings can be found in the "Default overtime settings"-section.
You can select from "Work time compensations (overtime, extra) according to CBA" menu which overtimes and extras are going to be itemized in the time reports for payroll (Users > Employees > Default overtime settings).
From "Overtime additives and other additives compensated as free time" and "Overtime base hours compensated as free time" menus you can select which overtimes and extras will be compensated as free time.
A tooltip of each field can be viewed by hovering your mouse over the headings.
More information about overtime assignments can be found in the Overtime assignments-guide.
Pricing
Setting up a pricing for a project
...
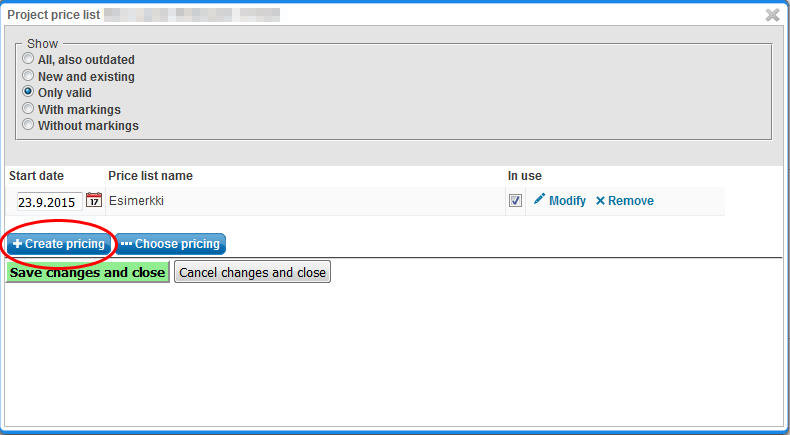
Buttons can be found below the list of price lists.
| Info |
|---|
| Price lists can be exported to a spreadsheet program, by pressing the () icon at the upper right corner of the list. Please note that the listing will only show the price lists of the project's unit. |
Hinnaston tiedot, joita voidaan asettaa:
- Alkupäivä (Hinnasto on tästä päivästä lähtien voimassa)
- Hinnaston nimi
- Käytössä (Rasti ruudussa tarkoittaa, että hinnasto on aktiivinen)
- Muokkaa (Tämä ohjaa sinut "Hinnaston muokkaus" -ikkunaan, joka käsitellään uuden hinnaston luomisen yhteydessä)
- Poista (Poistaa hinnaston)
Hinnastojen käyttäminen ja luominen voi olla tarkkaa puuhaa. Paljon lisäohjeita hinnoittelusta löytyy Hinnoittelu-ohjeista.
Hinnoittelutasojen esittely
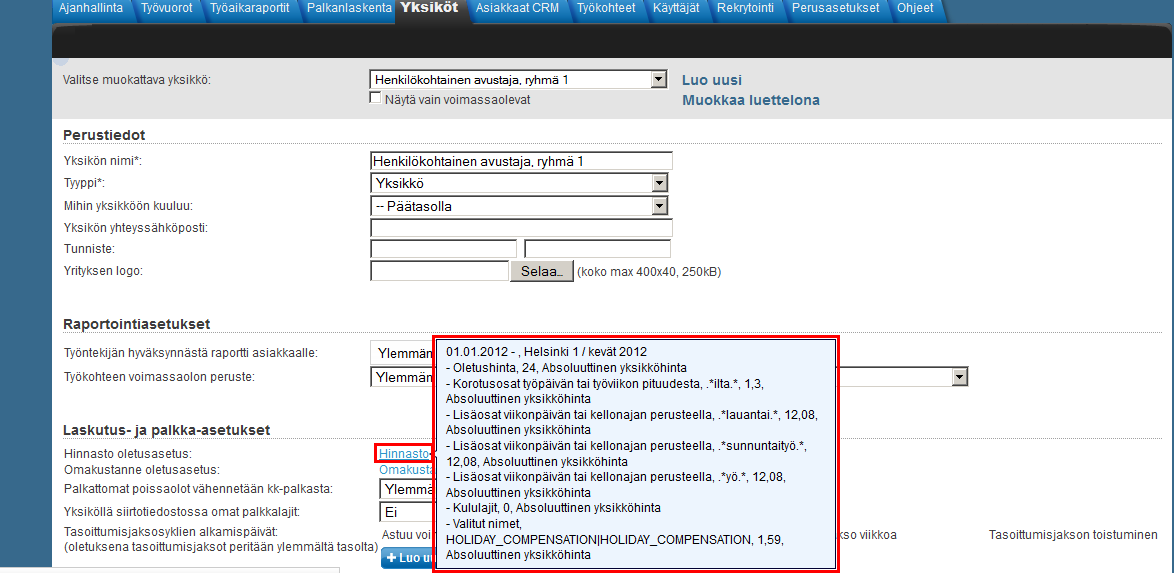
Hinnastoja on mahdollista asettaa erikseen työntekijöille, asiakkaille, työkohteille, sekä työtehtäville.
Äskeisessä esimerkissä käytiin jo läpi, kuinka työkohteen hinnastoa muokataan. Jos hinnastoja on käytössä usealla eri tasolla samanaikaisesti, niillä on olemassa tietty määräävyysjärjestys. Seuraavaksi käydään läpi eri hinnastot määräävyysjärjestyksessä.
Hinnastojen määräävyysjärjestys
- Työkohteen työntekijän hinta
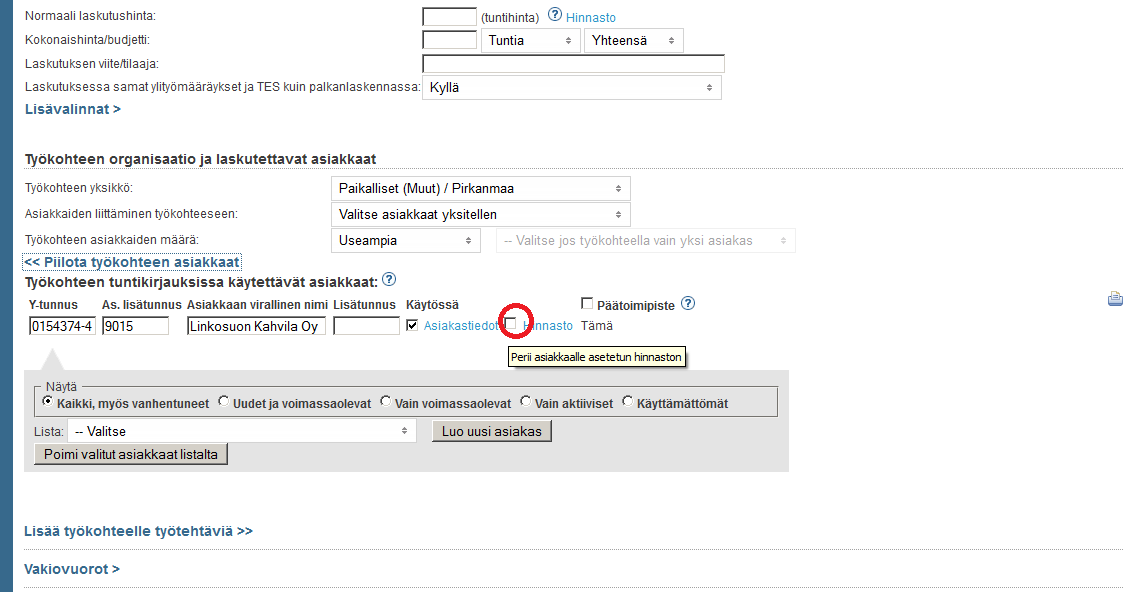
- Jos työkohteella on asiakas ja tälle on asetettu rasti hinnaston perintäruutuun:
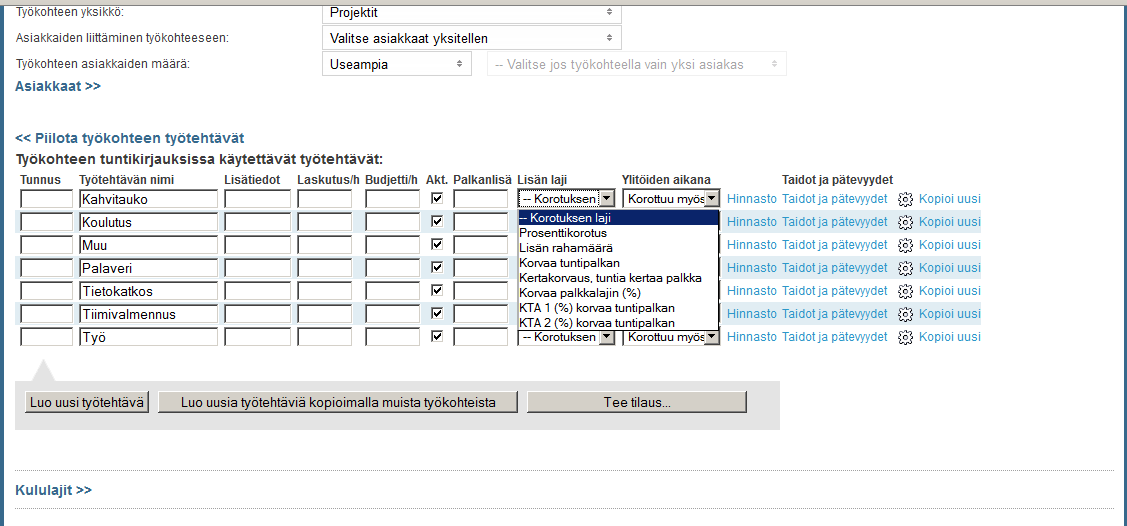
- Työtehtävän hinta
- Asiakkaan (tai tämän päätoimipisteen) asiakastiedoista löytyvä hinnasto
- Asiakkaan päätoimipisteen yksikön hinnasto
- Asiakkaan yksikön hinnasto
- Työkohteen asiakkaan hinnasto
- Työtehtävän hinta
- Työkohteen hinta
- Työkohteen yksikön hinta
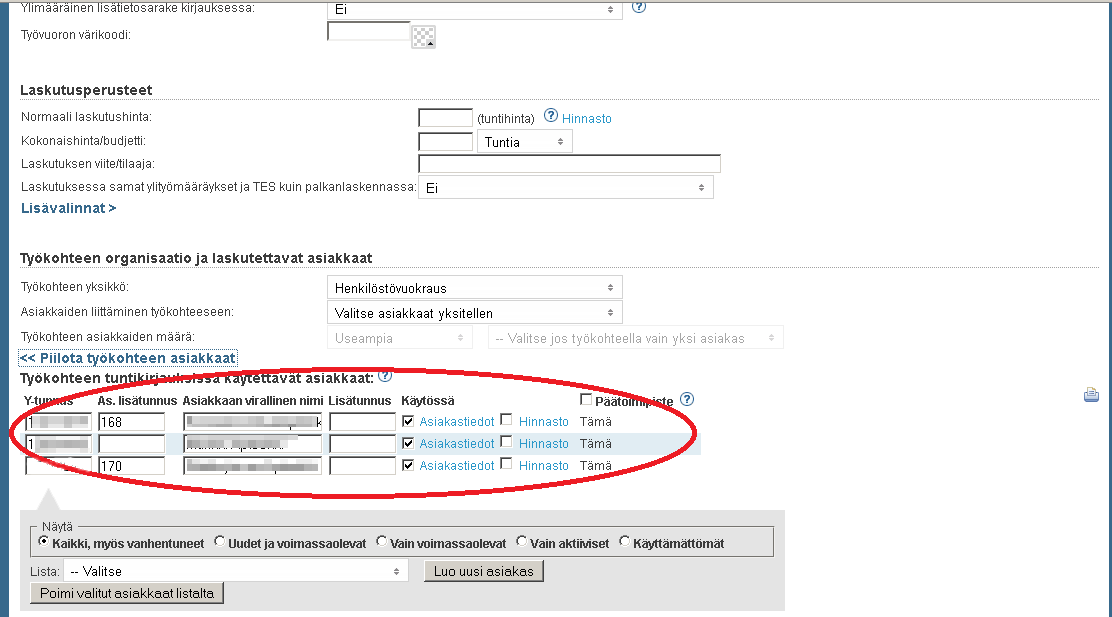
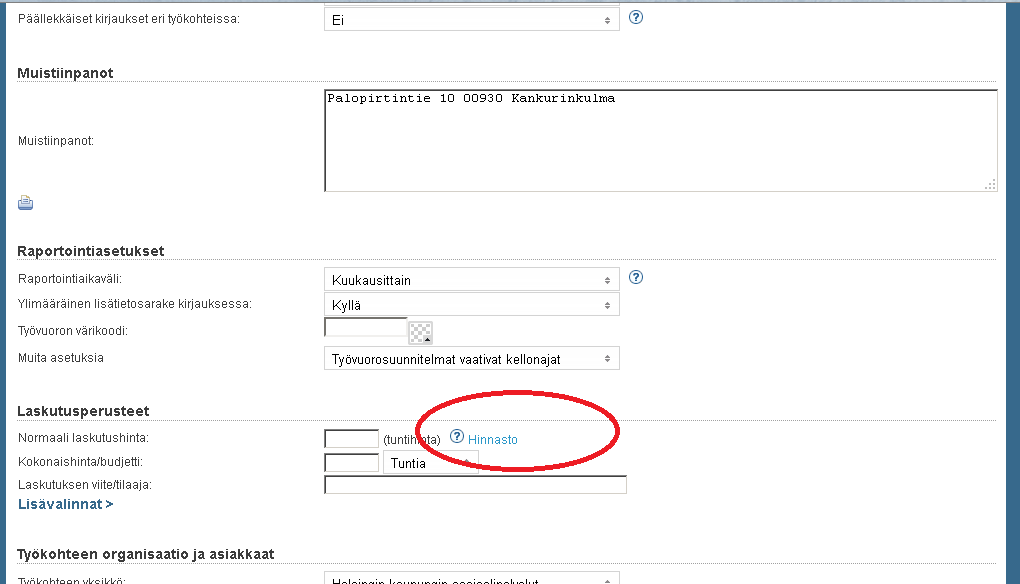
Hinnasto-linkkien sijainnit
- Työkohteen työntekijän hinta
2. Asiakas perii hinnaston
2. a) Työtehtävän hinta
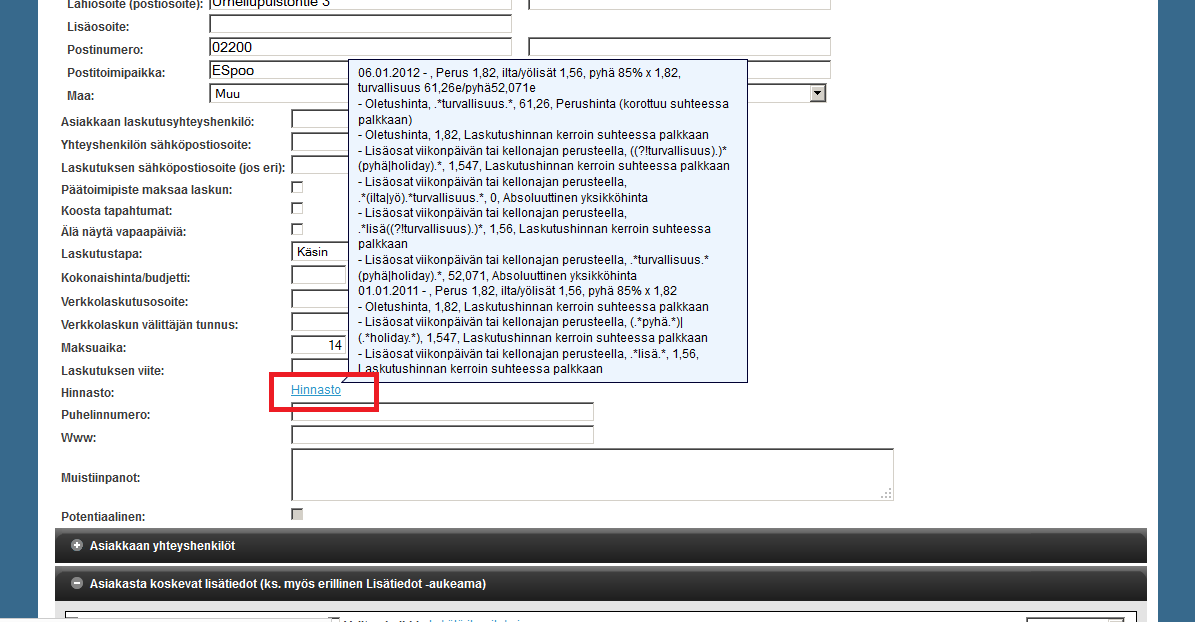
2. b) Asiakkaan hinnasto
Löytyy painamalla työkohteelle asetetun asiakkaan tiedoista "Asiakastiedot". Tämä avaa ikkunan, josta löydät asiakkaan "Hinnasto" -linkin. Vaihtoehtoisesti voit myös mennä "CRM" -välilehdelle.
Asiakkaan päätoimipisteen hinnasto
Sama kuin aiempi "Asiakkaan hinnasto", mutta muokataan asiakkaan pätoimipisteen hinnastoa.
2. c) Asiakkaan päätoimipisteen yksikön hinnasto
2. d) Asiakkaan yksikön hinnasto
Sama kuin aiempi "Asiakkaan päätoimipisteen yksikön hinnasto", mutta muokataan asiakkaan yksikön hinnastoa.
2. e) Työkohteen asiakkaan hinnasto
3. Työtehtävän hinta
4. Työkohteen hinta
5. Työkohteen yksikön hinta
Hinnastojen käyttäminen ja luominen voi olla tarkkaa puuhaa. Paljon lisäohjeita hinnoittelusta löytyy Hinnoittelu-ohjeista.
More information about pricing can be found in the Billing and pricing-guide.
Pricing levels
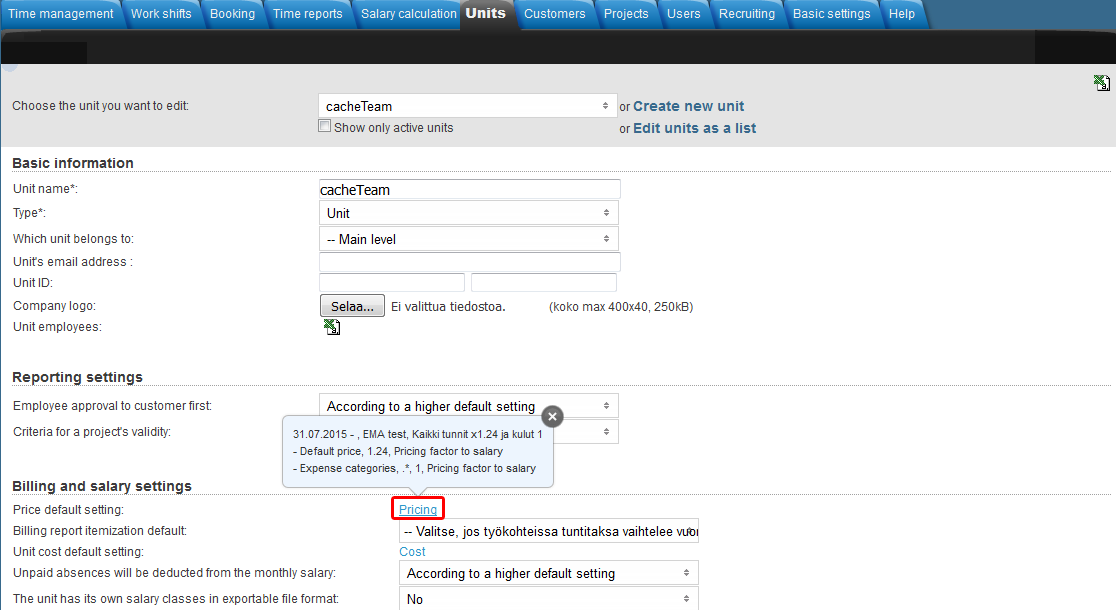
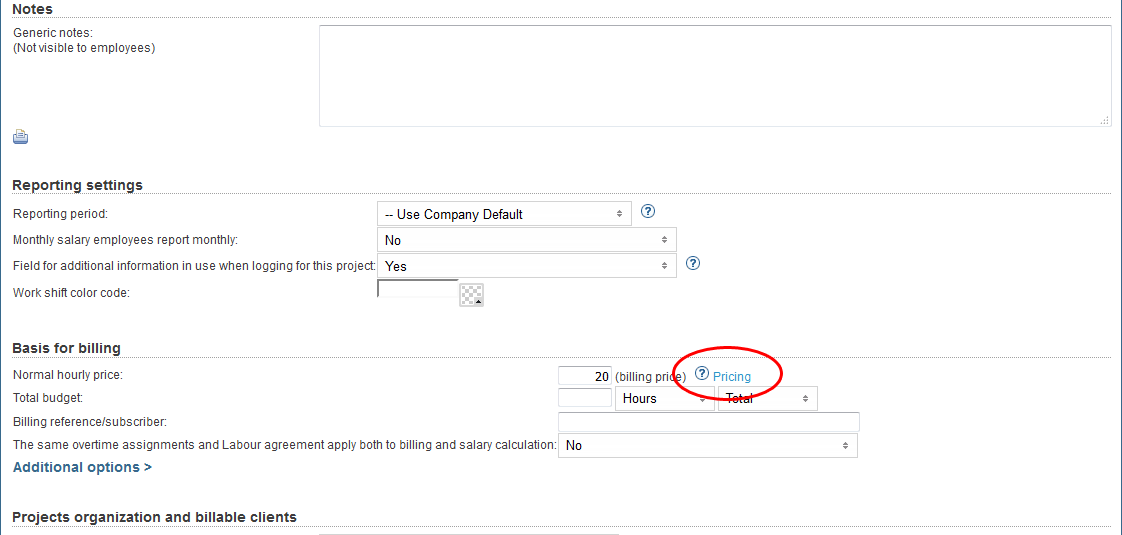
The following explains, from where the different price lists can be found and what is the imperative order of them.
The imperative order of the price lists
- Employee's price in a project
- If a project has a customer and the pricing checkbox for it has been selected:
- Price of the task
- Price of the project
- Price of the project's unit
Locations of the Pricing links
1. Price of the project's employee
2. Customer charges the price list
2. a) Price of the task
2. b) Price list of the customer
Can be found by pressing the "Customer details" link in the project's customers section. This opens a window, from where you can find customer's "Pricing" link. Alternatively you can also go to "Customers" tab.
Price list of the customer's headquarters
Same as the previous "Price list of the customer", but edit the price list of the customer's headquarters.
2. c) Price list of the customer headquarters' unit
2. d) Price list of the customer's unit
Same as previous "Price list of the customer headquarters' unit", but edit the price list of the customer's unit.
2. e) Price list of the project's customer
3. Price of the task
4. Price of the project
5. Price of the project's unit
More information about pricing can be found in the Billing and pricing-guide.
Saldojen kalibroiminen
Yleensä kun järjestelmän käyttö aloitetaan niin työntekijöillä voi olla vanhassa järjestelmässä säästettynä/kertyneenä liukumasaldoa tai muita vapaaksi muutettuja eriä esim. lomarahavapaata tai vuosilomia tai ylityövapaata. Jotta saldot täsmäävät uudessa järjestelmässä niin saldot täytyy kalibroida/kopioida tuntinettiin, siis työntekijäkohtaisesti käydään ne asettamassa kohdalleen.
...
Sivulla näet listan saatavilla olevista lisäominaisuuksista.
...
Lisäominaisuuksien käytöstä maksetaan poleteilla. Jokaisesta lisäominaisuudesta veloitetaan yksi poletti per palvelun käyttäjä per kalenteri kuukausi.
...
