This manual demonstrates with examples, how to start using Tuntinetti and how it's basic functions work.
...
- Write the start date of the contract. It can also be set from the calendar menu.
- Choose the labour agreement. There are lots of choices but if the suitable one is missing, you can choose (Jos muu niin kerro mikä, voimme lisätä toivomuksesta), this means "If something else, tell us what", and write the labour agreement you want. This way our customer support will add it to the system and inform you about it with email.
- The work time mode fields will be filled based on the labour agreement. They can be modified if needed.
- Next write the salary information. If you don't find it necessary to use the Tuntinetti's payroll functions, the salary mode is enough: bill, hourly salary or monthly salary.
- From the gear -icon you can set additional information for example employee benefits if needed.
...
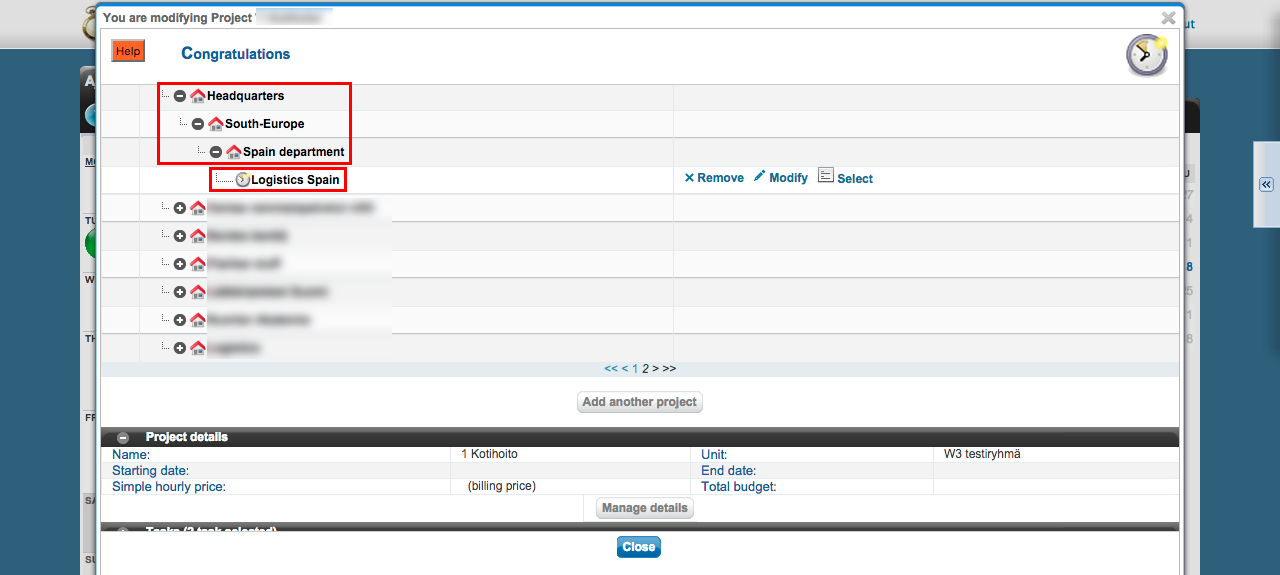
There is a diagram about the company's units. Also the projects below each unit are shown. The projects can be moved from one unit to another by dragging them over unit's names.
Creating a new project
Lets create one example project by clicking Add another project -button.
...
If the project has only one customer, you can select the customer in the "Project's customer"-field.
You can view all of the project's customers by clicking "Customers" in the "Projects organization and billable clients"-section.
...
First you must select a time period and desired employees. When these have been selected the "Select salary sheet" drop-down list will be updated to have the desired salary sheets. There you can choose a certain salary sheet.
...
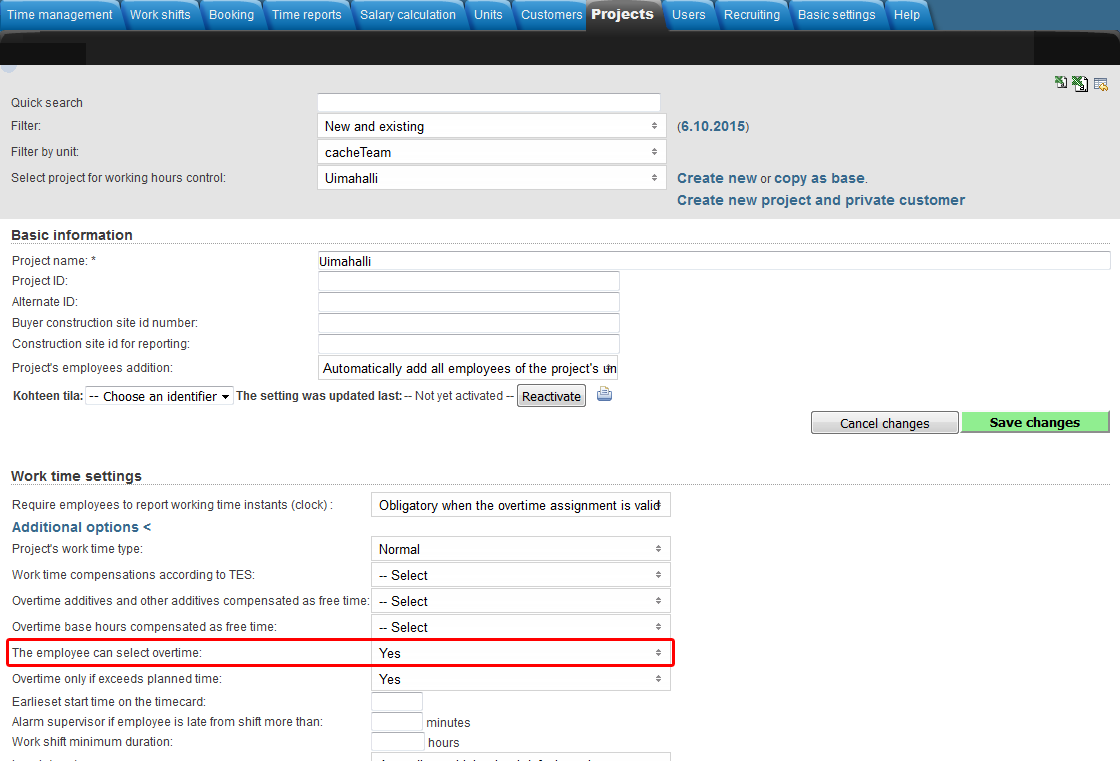
Adding an overtime assignment on the project level takes place in the Projects-tab.
Make sure that you have selected the desired project in the "Select project for working hours control"-drop-downlist.
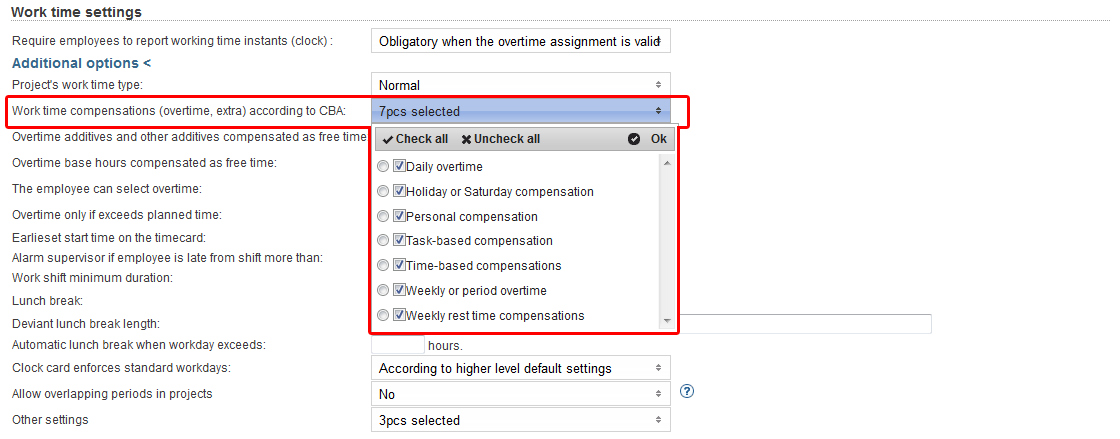
Overtime settings can be found in the "Work time settings"-section and clicking the "Additional options"-button.
You can select from "Work time compensations (overtime, extra) according to CBA" menu which overtimes and extras are going to be itemized in the time reports for payroll (Projects > Work time settings > Additional options).
From "Overtime additives and other additives compensated as free time" and "Overtime base hours compensated as free time" menus you can select which overtimes and extras will be compensated as free time.
A tooltip of each field can be viewed by hovering your mouse over the headings.
You can select "The employee can select overtime", which allows employees to set overtime assignments for themselves.
From "Other settings" menu, you can select the project work time decomposition setting to override possible employee work time decomposition settings.
...
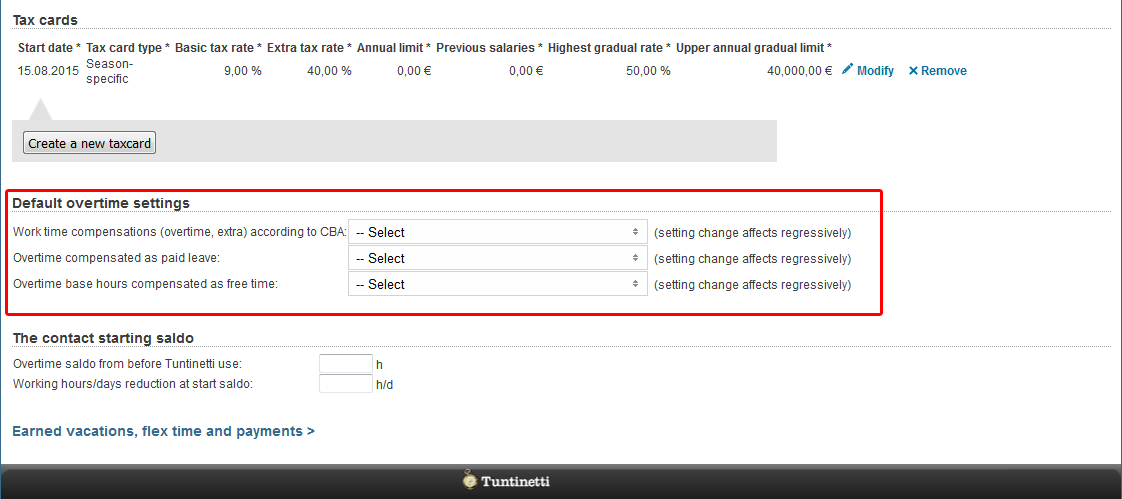
Adding an overtime assignment on the employee level takes place in the Users > Employees-tab.
Make sure that you have selected the desired employee in the "Select user to edit"-drop-downlist.
Default overtime settings can be found in the "Default overtime settings"-section.
You can select from "Work time compensations (overtime, extra) according to CBA" menu which overtimes and extras are going to be itemized in the time reports for payroll (Users > Employees > Default overtime settings).
From "Overtime additives and other additives compensated as free time" and "Overtime base hours compensated as free time" menus you can select which overtimes and extras will be compensated as free time.
A tooltip of each field can be viewed by hovering your mouse over the headings.
More information about overtime assignments can be found in the Overtime assignments-guide.
Pricing
Setting up a pricing for a project
...
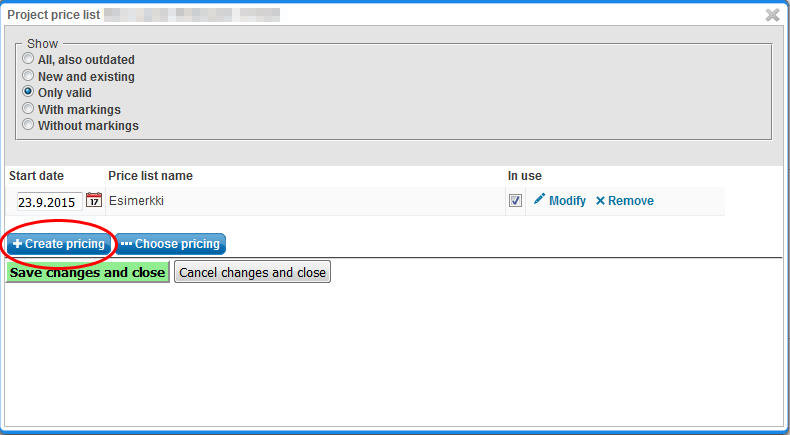
Buttons can be found below the list of price lists.
"Poimi listasta"-painikkeesta aukeavasta ikkunassa näkyvät aiemmin luodut hinnastot. Tässä ikkunassa voi seuloa hinnastoja käyttämällä hakusanoja. Hinnaston asettaminen työkohteelle tapahtuu painamalla hinnaston nimeä.
Tuotu hinnasto päivittyy listattuna työkohteen tietoihin.
| Info |
|---|
| Price lists can be exported to a spreadsheet program, by pressing the () icon at the upper right corner of the list. Please note that the listing will only show the price lists of the project's unit. |
Hinnaston tiedot, joita voidaan asettaa:
...
Sivulla näet listan saatavilla olevista lisäominaisuuksista.
...
Lisäominaisuuksien käytöstä maksetaan poleteilla. Jokaisesta lisäominaisuudesta veloitetaan yksi poletti per palvelun käyttäjä per kalenteri kuukausi.
...
