This manual demonstrates with examples, how to start using Tuntinetti and how it's basic functions work.
...
- You may either enter the start date manually or use the calendar menu.
- Choose the labour agreement. There are lots of choices but if the suitable one is missing, you can choose (Jos muu niin kerro mikä, voimme lisätä toivomuksesta), this means "If something else, tell us what", and enter the name of the labour agreement that you need. Our customer support will add it to Tuntinetti and send you email when it's available.
- The work time mode fields will be pre-filled based on the selected labour agreement. They can be modified as needed.
- Next you can enter the salary information. If you don't find it necessary to use the Tuntinetti's payroll functions, it's sufficient to fill the Salary mode -field (bill / hourly salary / monthly salary).
- From the gear -icon you can set additional information as needed, such as employee benefits.
...
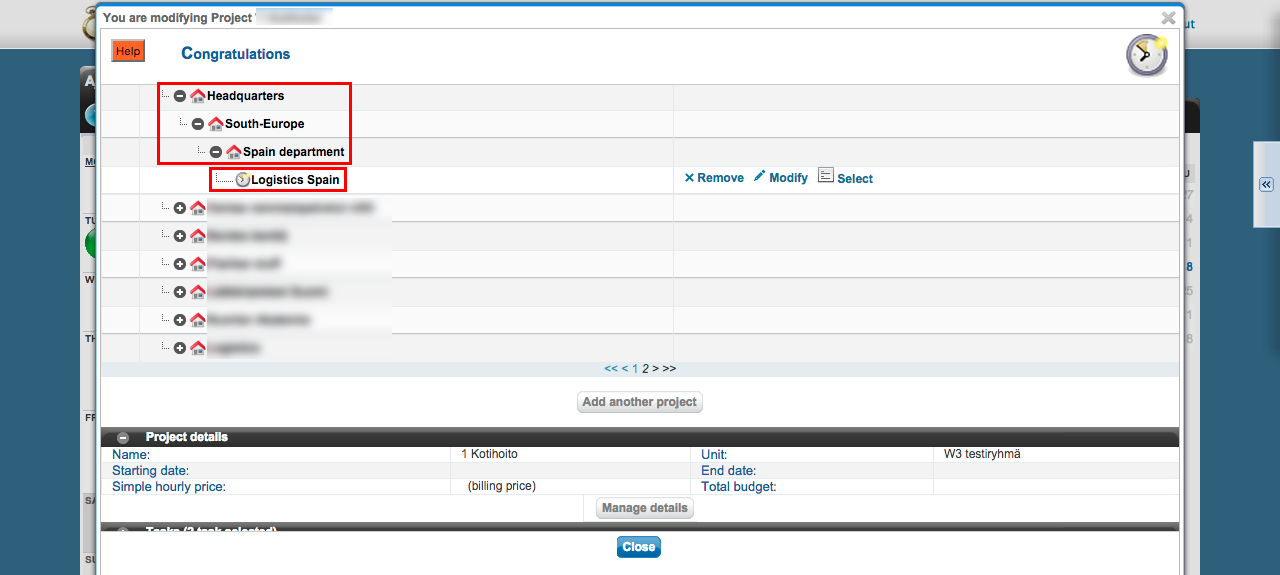
On top of the wizard there is a diagram about the company's units. It also shows the projects below each unit. You can move the projects from one unit to another simply by dragging them.
Creating a new project
Lets create one example project by clicking Add another project -button.
...
If the project has only one customer, you can select the customer in the "Project's customer"-field.
You can view all of the project's customers by clicking "Customers" in the "Projects organization and billable clients"-section.
...
First you must select a time period and desired employees. When these have been selected the "Select salary sheet" drop-down list will be updated to have the desired salary sheets. There you can choose a specific salary sheet.
...
The following demonstrates sick leave management in Tuntinetti. In sick leave management administrator or superior can add, view and modify sickleavessick leaves. This can be done in the Sick leave management-tab.
...
The default length for the workshift cycle is set by labour agreement. Typically, the length on the labour agreement level is 1, 2 or 3 weeks. When you need to set deviant workshift cycles that differ from those set in labour agreement, the lengths length of the period cycle is set in: the company's basic information for company level, the unit settings for unit level and in employee's contract settings for employee level. Settings are inherited from the unit's settings to unit's employees, either on the grounds that the employee is positioned to the unit in question or that the unit has been selected in the "Work time cycle group" in the additional settings of the employee's contract.
...
| Info |
|---|
| You can select multiple units and employees. Consecutive lines can be selected by drag-selecting with mouse or with SHIFT key and individual lines with CTRL key. |
Employees Employee reports open automatically below selection menus, everyone to their own worksheetone worksheet per employee, if "Auto-refresh" Preview mode is selected. If "Refresh on-demand from show-button" is selected, remember to press "Show" after selecting the employees.
...
- Unit level is on the bottom.
- Project level is over unit-stage but under employee-stage. This might be the reason why a change to the unit-stage's overtime assignment hasn't affected the calculation.
- Employee level is on the top, and overrides the project- and unit levels.
Adding an overtime assignment on the unit level
...
You can select from "Work time compensations (overtime, extra) according to CBA" menu, which overtimes and extras are going to be itemized in the time reports for payroll (Units > Work time settings). These settings apply to all employees of the unit, unless defined otherwise on project or employee level.
...
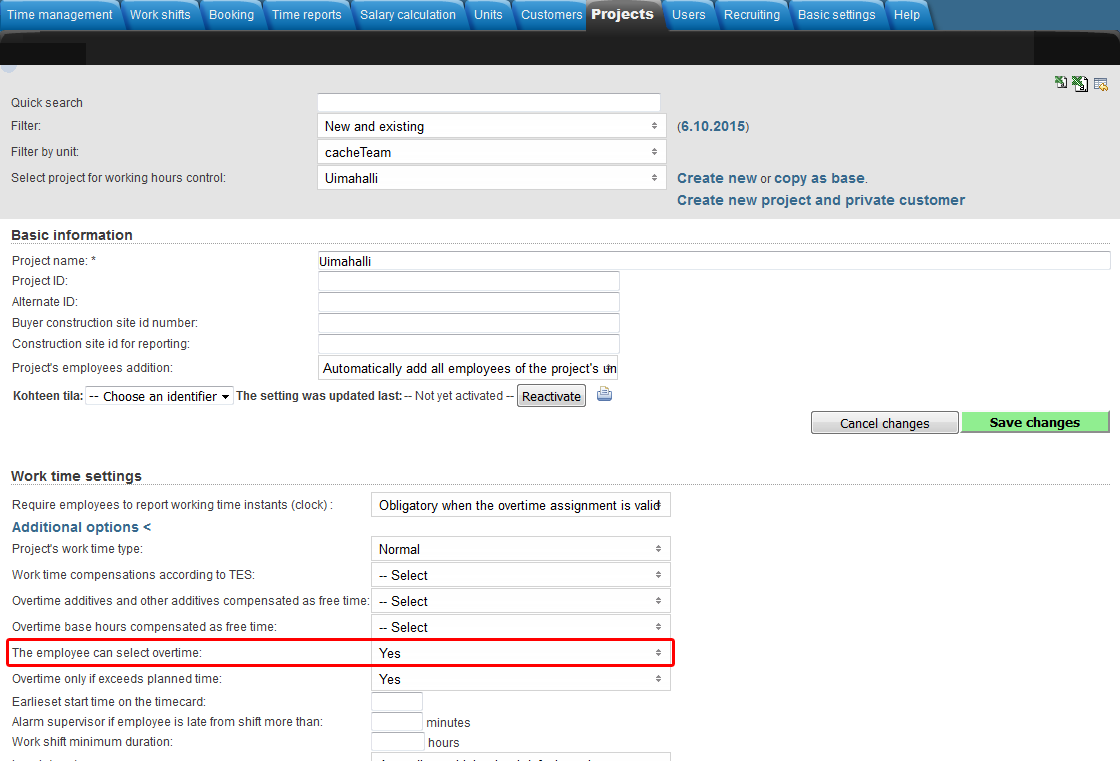
Adding an overtime assignment on the project level takes place in the Projects-tab.
Make sure that you have selected the desired project in the "Select project for working hours control"-drop-downlist.
Overtime settings can be found in the "Work time settings"-section and clicking the "Additional options"-button.
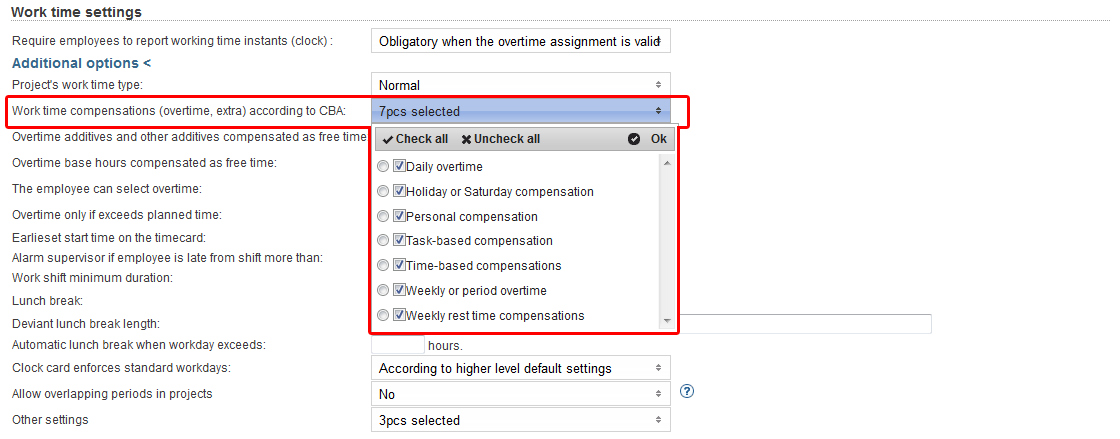
You can select from "Work time compensations (overtime, extra) according to CBA" menu which overtimes and extras are going to be itemized in the time reports for payroll (Projects > Work time settings > Additional options).
From "Overtime additives and other additives compensated as free time" and "Overtime base hours compensated as free time" menus you can select which overtimes and extras will be compensated as free time.
A tooltip of each field can be viewed by hovering your mouse over the headings.
You can select "The employee can select overtime", which allows employees to set overtime assignments for themselves.
From "Other settings" menu, you can select the project work time decomposition setting to override possible employee work time decomposition settings.
...
Adding an overtime assignment on the employee level takes place in the Users > Employees-tab.
Make sure that you have selected the desired employee in the "Select user to edit"-drop-downlist.
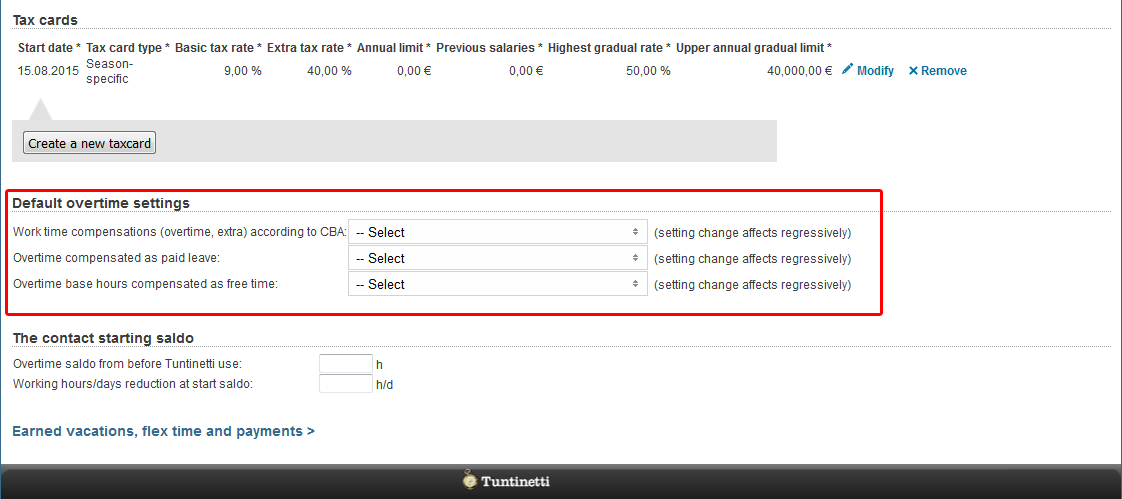
Default overtime settings can be found in the "Default overtime settings"-section.
You can select from "Work time compensations (overtime, extra) according to CBA" menu which overtimes and extras are going to be itemized in the time reports for payroll (Users > Employees > Default overtime settings).
From "Overtime additives and other additives compensated as free time" and "Overtime base hours compensated as free time" menus you can select which overtimes and extras will be compensated as free time.
A tooltip of each field can be viewed by hovering your mouse over the headings.
More information about overtime assignments can be found in the Overtime assignments-guide.
Pricing
Setting up a pricing for a project
...
More information about altering time reports can be found in the Time reports for payroll-guide.
...
Paid features of Tuntinetti
The paid features of Tuntinetti diversifies the usage of the program concerning time management, billing and work shift planning. If you have the manager rights, you can select which additional features are activated or removed.
...
The page contains a list of the features that are available.
When you hover on a question mark with your mouse, you can read a tipEach feature has a tool tip explaining the feature. You can see the tool tip by hovering the mouse cursor on top of the feature.
The second column has a mark in it, if the feature has been used in the present month.
...
Confirm the activations by saving your changes with chosen features by clicking the "Save changes"-button in the bottom of the screen.
Tuntinetti charges only by the features used, not when a feature is activated but not used. Every feature costs one coin per service uder per user per calendar month.
You can see your coin balance in the right part of the page.
...
Learn to use Tuntinetti in a couple of days! Tuntinetti offers training for basic users to main usersand administrators. Contact Tuntinetti sales (+358-(0)9-6898 8221) and we'll tell you more.
...
By purchasing a training session, you ensure your own know-how. Time After training, time will not be wasted, work hours will be effective and you can set up your settings rightcorrectly.
Our instructor will come to your work place for one or more whole work days and makes sure that your main users administrators will learn to use all the features in Tuntinetti.
...
We arrange regularly Webinars concerning the topics that our clients wish for. Our Webinars are designed so that they can be attended by both basic users that rarely make changes and users that use Tuntinetti more regularly.
...


