Time management > Time reporting
...
The following introduces time reporting and how to change between the different time reporting views. All employees can enter their daily working hours in Tuntinetti, and the program will do all the necessary classifications. The employees can also report expenses, such as mileage and daily allowances. Employees can enter their working hours under the Time reporting tab. Tuntinetti has three different possibilities for entering data, all specifically designed for different needs: a simple view (Times only), categorized view (Explanatory field) and a combination of the simple and categorized view (Mixed mode: multiple times and explanations).
...
Simple view
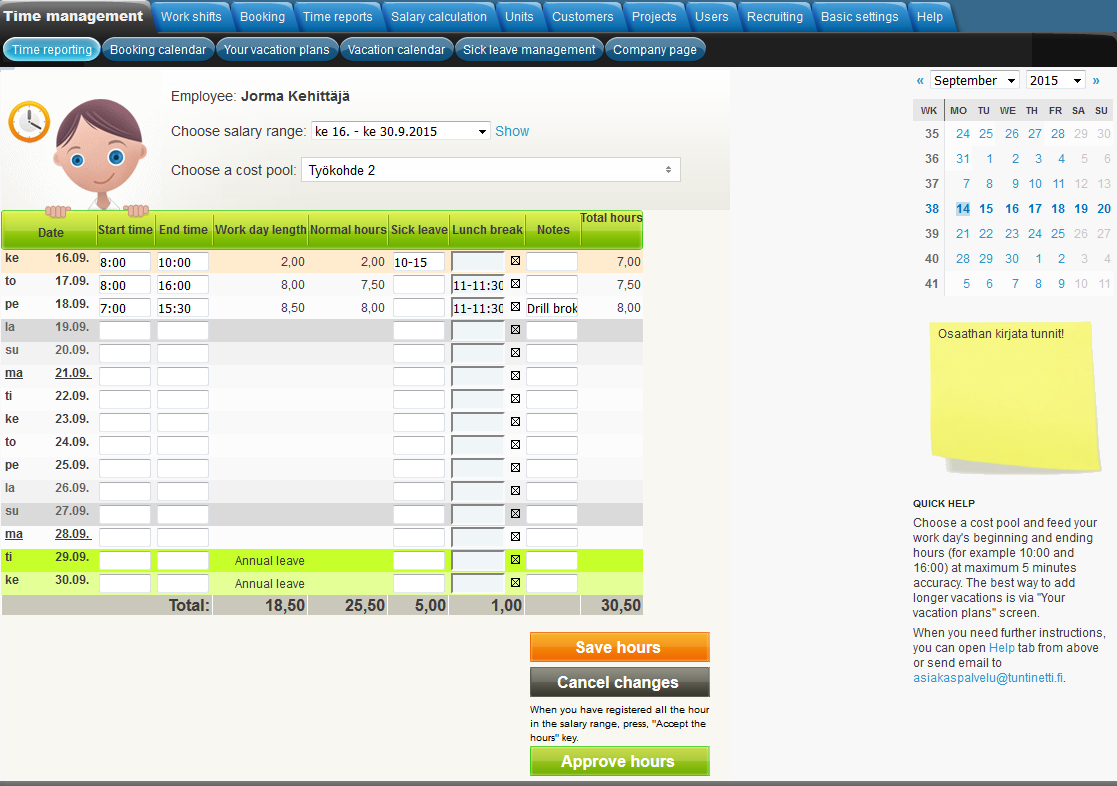
Recording work hours
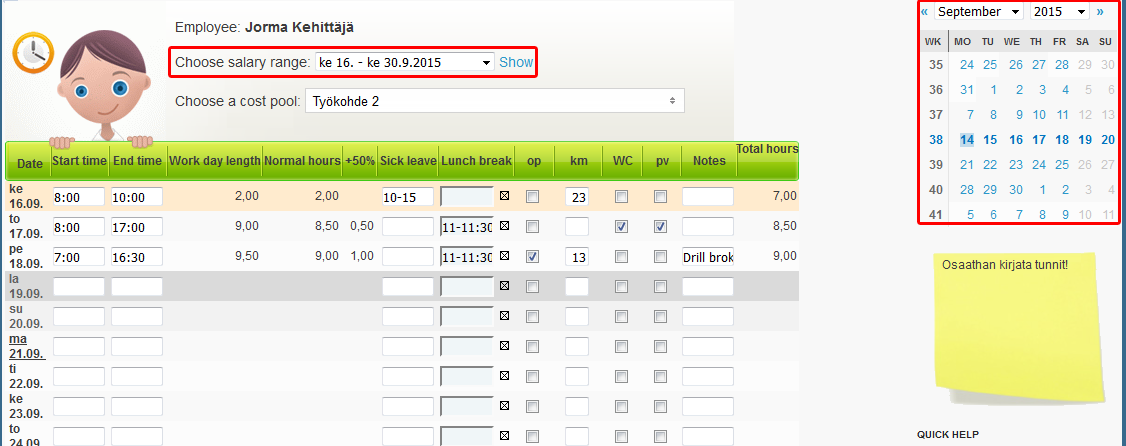
Make sure that the salary time period is correct
...
...
Enter the start and end time of your lunch break
...
Check whether the hours are recorded correctly
...
Make sure that the salary time period is correct
Make sure that the salary time period is correctMake sure that the salary time period is correct.
Select the project you have been working for
...
Categorized view
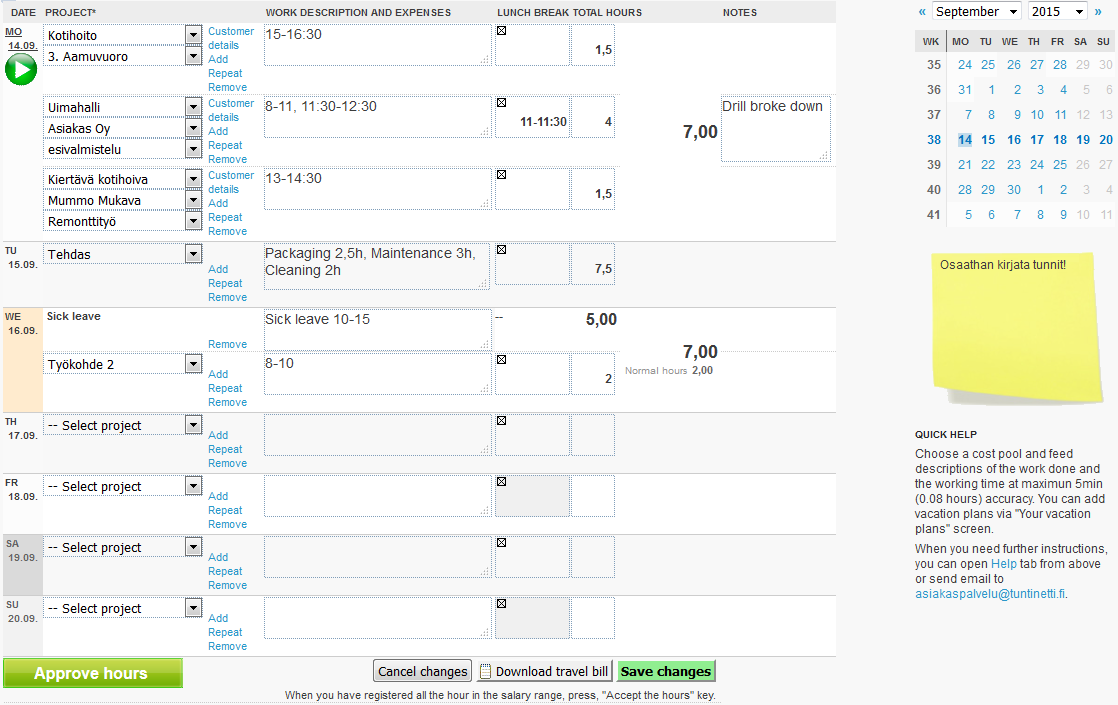
Recording work hours
- Make sure that the shown time period is correct
- Choose a day and then choose the project you have been working for
- Detail the day's tasks according to the starting and ending times, not including the lunch break
- Add the possible expenses and notes
- Enter the lunch break
- If necessary, you can also add another project for the same day
- Save the data
Make sure that the shown time period is correct
...
Project can be selected, from the "Select project" menu in the "PROJECT" column. If customers and tasks have been assigned for the project, you can select a customer and a task from the "Select customer" and "Select task" menus, that appear under the selected project. As a default, the system suggests the project that has recently been most active (unless there is only one choice).
Besides project, you can also select an absence, such as sick leave, from the "Select project" menu.
...
| Info |
|---|
| You can also record work hours with Play-Pause button. |
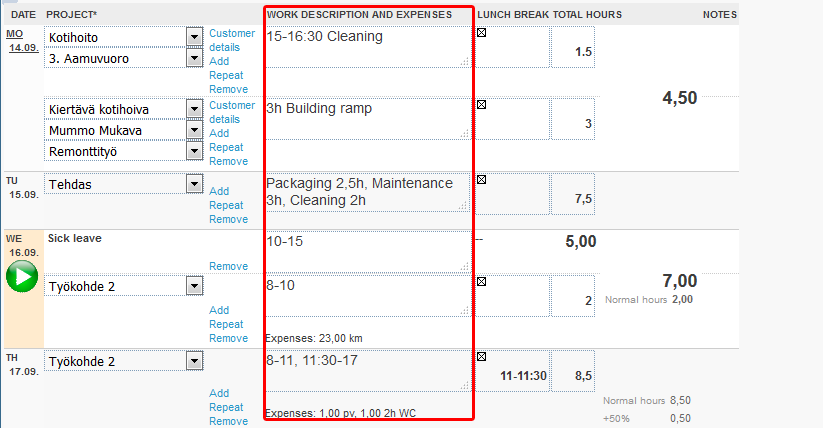
Add the possible expenses and notes
...
| Info |
|---|
| A superuser can set the recording possibility off by un-checking Work time recording enabled in detailed work hours reporting form in Other settings in the Basic settings. |
...
If you are using labour agreement, that has "Travel time compensates flex time up to standard hours" option selected in the "Other options" menu, part of the work day can be used for traveling without reducing it from the flextime. Travel compensation information will be displayed in the work hours itemization in the time reporting and time reports.
...
Combination of the simple and categorized view

Recording work hours
Make sure that the shown time period is correct
...
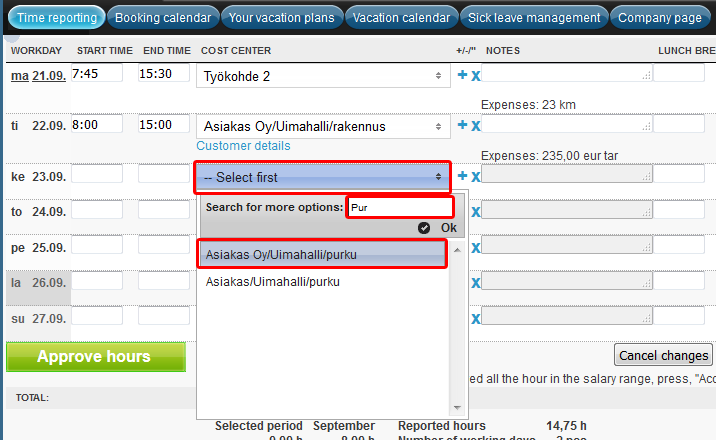
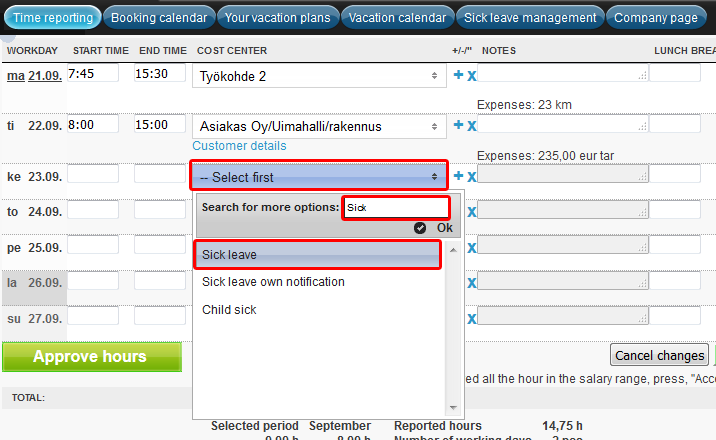
Select project from the "Select first" menu on the "COST CENTER" column under the day you want. When you start to write in the "Search for more options" text field, program offers list of options based on the search word(s). As a default, the system suggests the project that has recently been most active (unless there is only one choice).
Set start and end time
The program will also give suggestions.
...
Other features
Adding absence
Absence, like sick leave, can be added from the same menu as the projects. When you start to write in the "Search for more options" text field, program offers list of options based on the search word(s).
Approving hours
...
You are able to retrieve work shift prints in the Work shifts tab's sub tab Work shift prints. Follow next steps to retrieve work shift prints:
- Selecting time range
- Filtering53169466
- Choosing work shifts
- Grouping shift lists53169466
- 53169466
- Downloading or printing shift lists
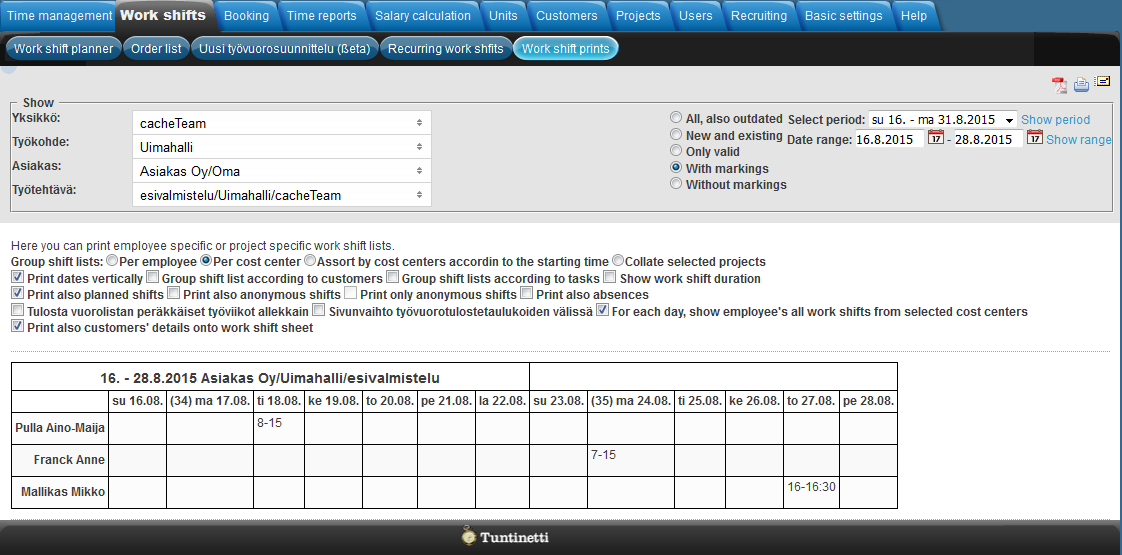
Selecting time range or period
...
- Print dates vertically
- This turns all dates in the table horizontally and employees, projects, etc. vertically
- Group shift list according to customers
- If the tables have been selected to be formed according to work shifts or their starting time, they can be further divided by customers, tasks or both
- Group shift lists according to tasks
- If the tables have been selected to be formed according to work shifts or their starting time, they can be further divided by customers, tasks or both
- Show work shift duration
- Select this to display also the work shift lenghts (in hours) in addition to the time of day
- Print also planned shifts
- With this option, the tables show also the shifts that have not yet been confirmed
- Print also anonymous shifts
- If "Print also planned shifts" is selected, you can select this to make also the anonymous (no employees marked for them yet) shifts visible. "(nimettömät vuorot)" is displayed as the employee of these shifts.
- Print only anonymous shifts
- If "Print also planned shifts" and "Print also anonymous shifts" are selected, you can select this to show only the anonymous shifts
- Print also absences
- Select this, to show also the shifts, even if the employee is absent. In this case, the reason for the absence is marked instead of the work time
- Print consecutive weeks below each other
- With this selection, you can structure the tables to have shift lists successive weeks one below another
- With this selection, you can structure the tables to have shift lists successive weeks one below another
- Print each work shift table onto its own page
- Select this to print every work shift list to separate sheet, as far as they each fit into one sheet of paper
- Select this to print every work shift list to separate sheet, as far as they each fit into one sheet of paper
- For each day, show employee's all work shifts from selected cost centers
- This can help, for example, to find free employees when looking for substitutes
- Print also customers' details onto work shift sheet
- Select this, to show additional information about the customers in the table, typically customer addresses
...