The mobile NFC/QR clock card can be used with any smart phone (iOS, Android and Windows Phone), which either supports NFC or has the ability to read QR codes.
...
Using a Portable NFC/QR Mobile clock card device
When the stamping software is installed and turned on, the screen should look like the following.
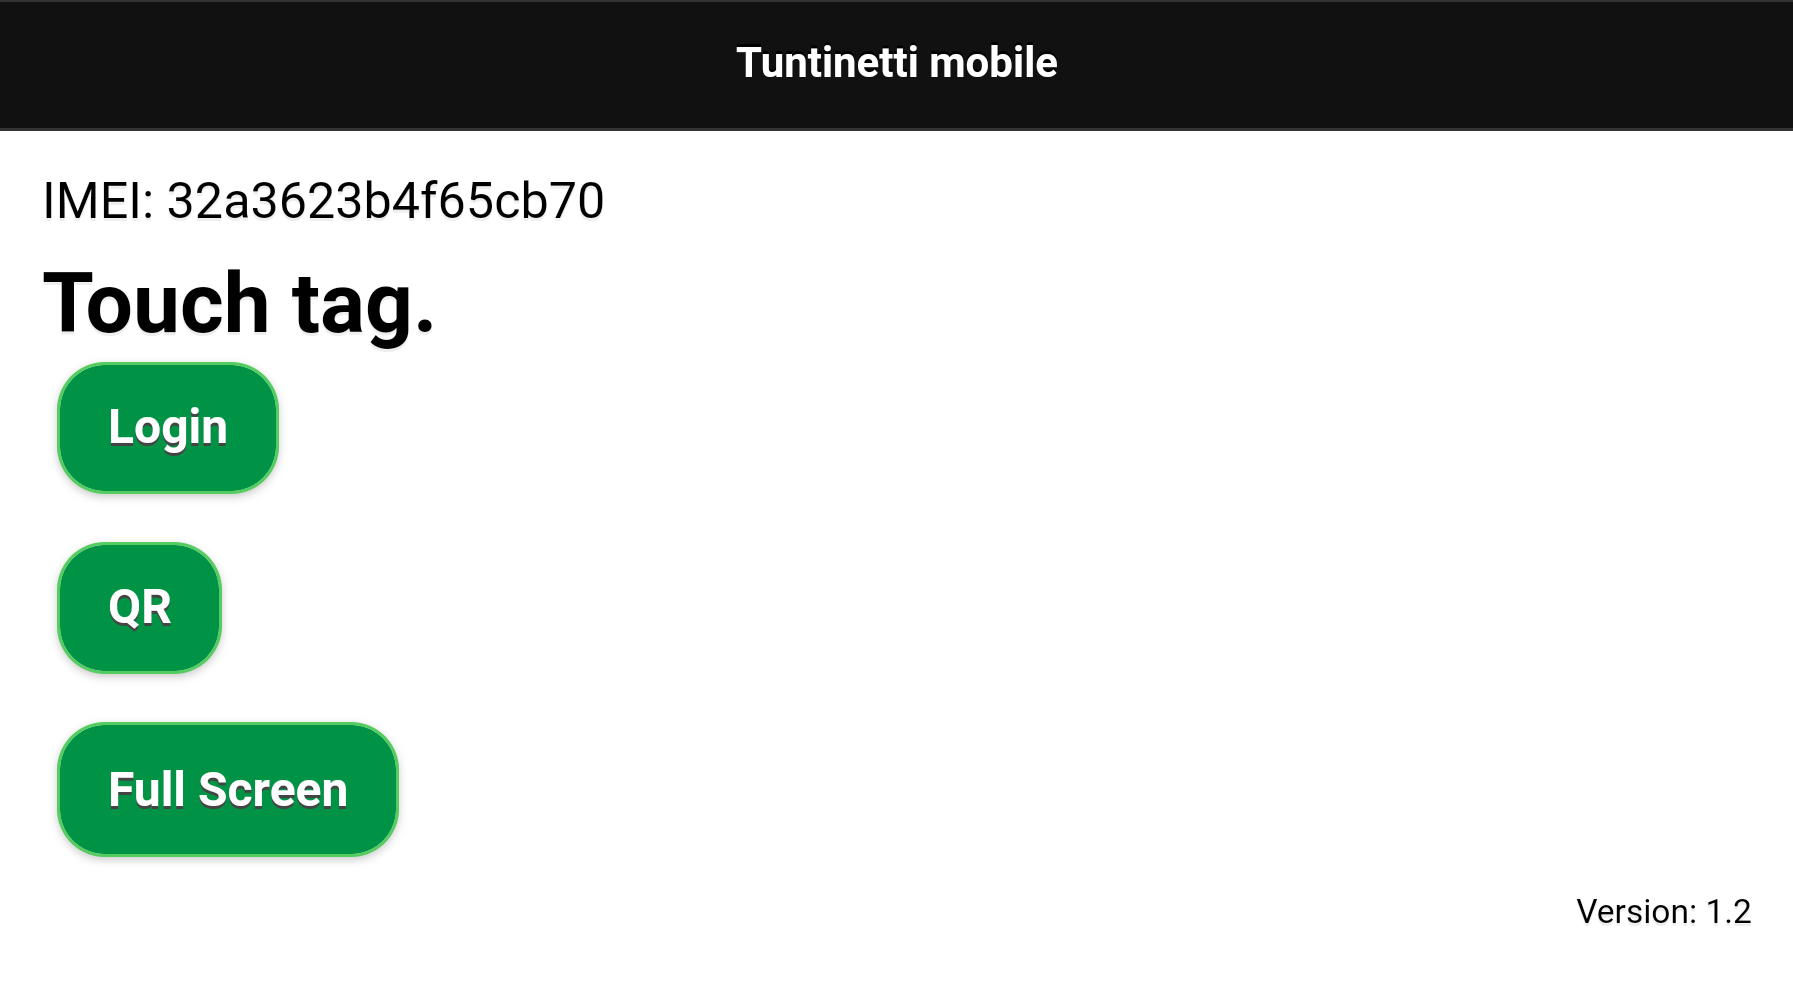
Employees can make time stamps directly, if the Mobile clock card is personal which means that the Mobile clock card device's IMEI code has been entered to the employee's Alternate ID field. A time stamp can be made with a NFC tag or with a QR code.
Notice! If you want to use username/password authentication with the mobile app, you need to activate setting: Company's basic information -> Other settings -> Allow login from Mobile time and attendance tracking App. This is a case that the Mobile clock card device isn't personal (the device is used by multiple employees and the IMEI code can't be added to a single employee), employee must login first to use the device.
Login
When the Mobile clock card device isn't personal, employee must be identified by account information. You can login with the "Login" button.
...
After the employee has logged in, a time stamp can be made by reading a NFC tag or a QR code.
Reading NFC tag
NFC tag can be read by touching the mobile device with it. When the tag has been read, the screen automatically updates so the stamping procedure can be finished.
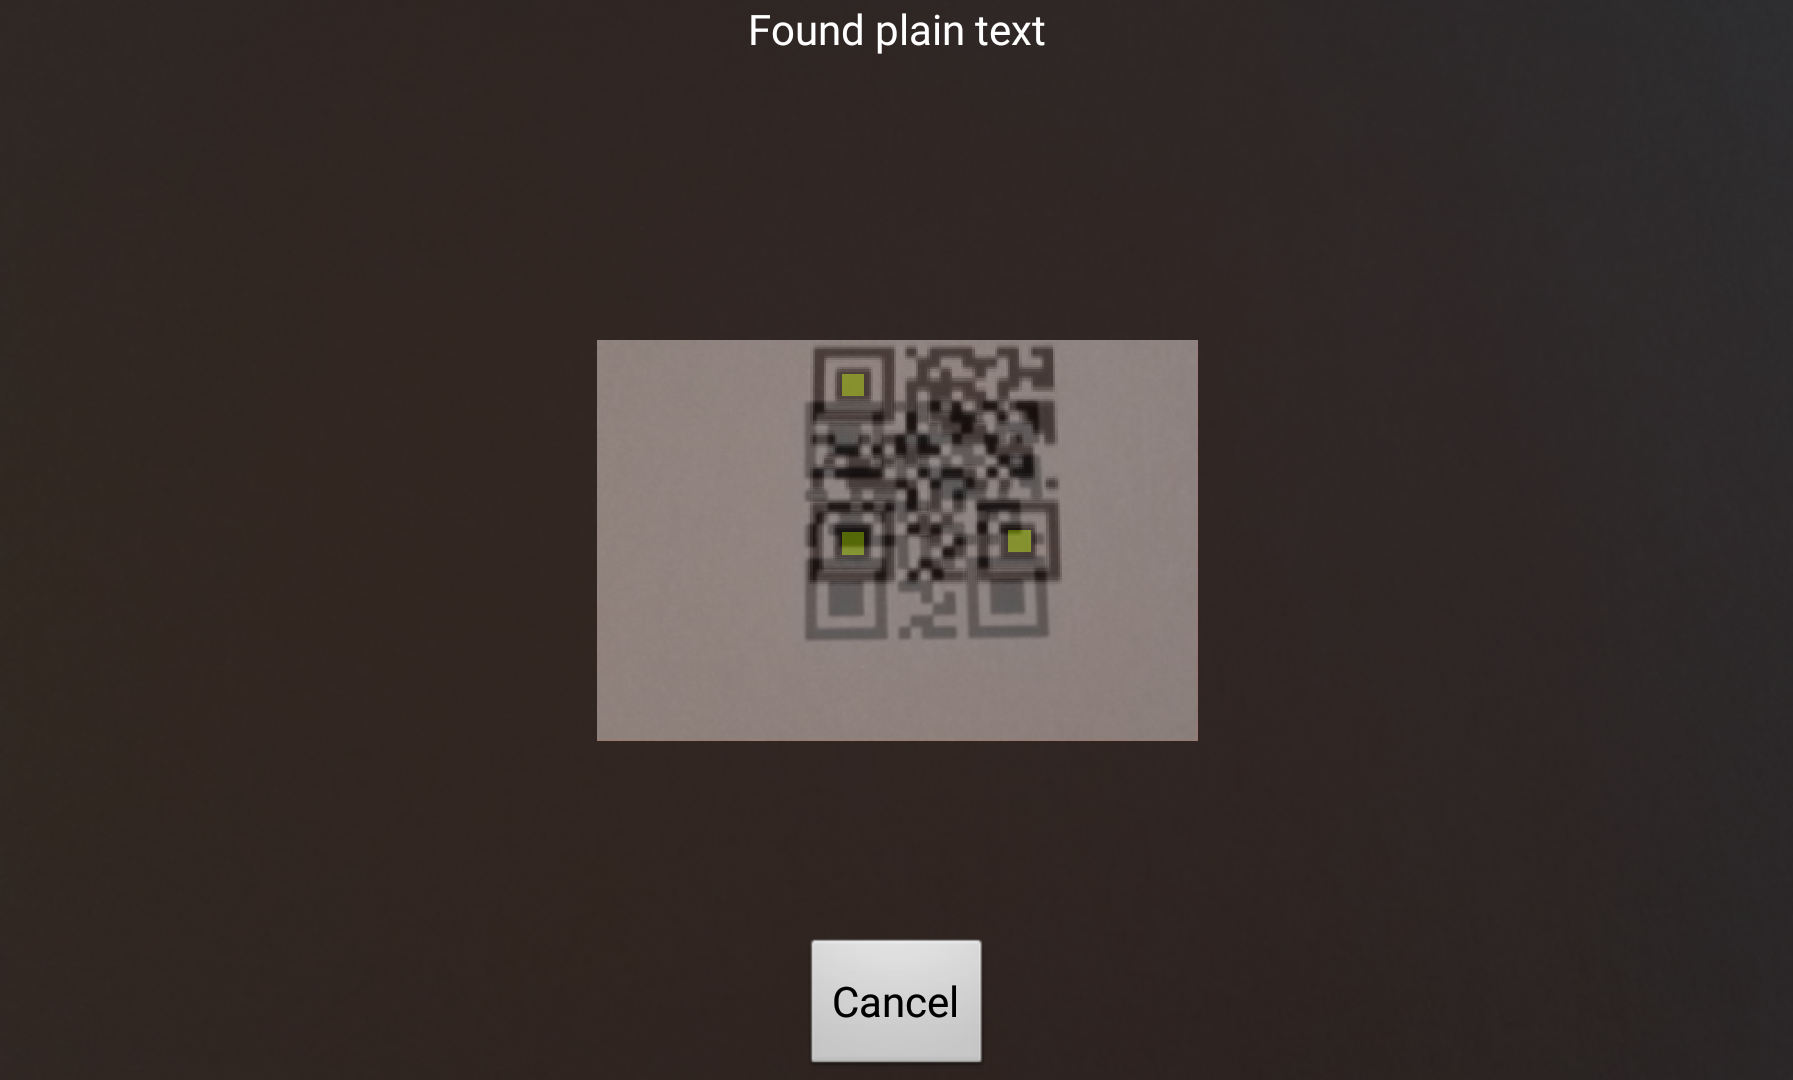
Reading QR code
QR codes can be read by pressing the QR button. This opens up the mobile device's camera and it should be pointed to the QR code.

When the QR code has been read, a notification pops up and the camera is turned off automatically.
Stamping
When a NFC tag or a QR code has been read, the stamping procedure must be finished.
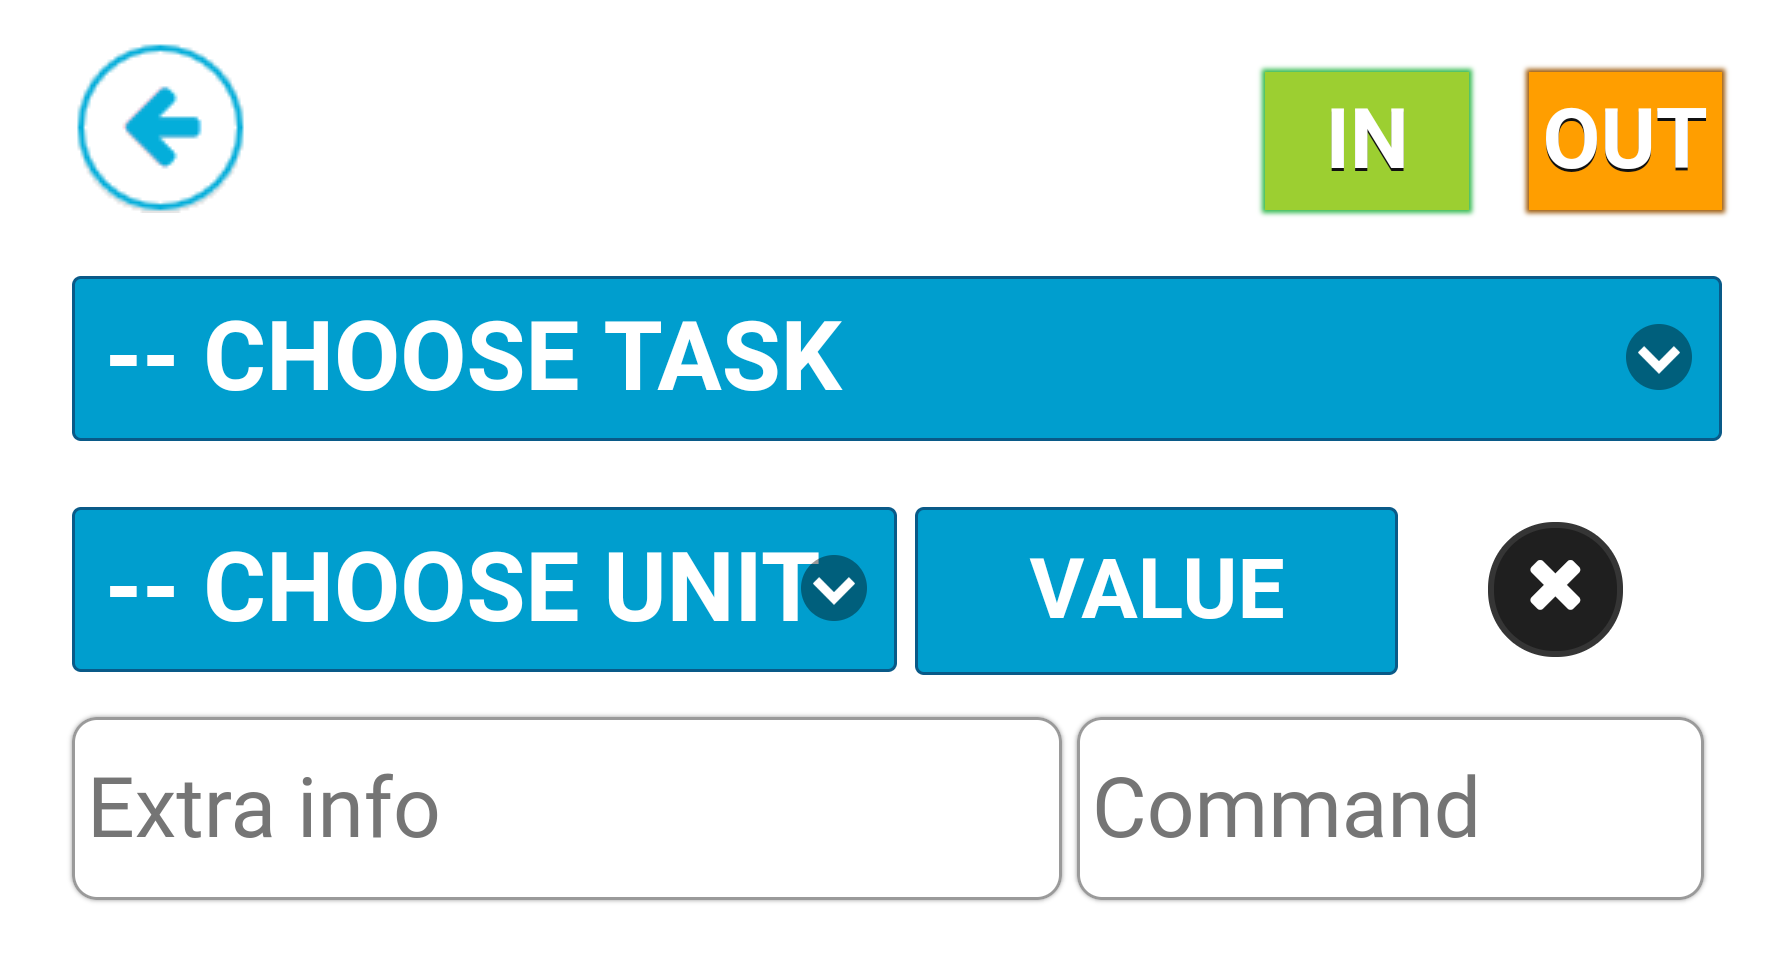
In this window, the first thing is to select/enter a project/task ("-- CHOOSE TASK" menu). Then it is possible to add expenses ("-- CHOOSE UNIT" menu and "VALUE" field), extra information ("Extra info" field), a command ("Command" field) and the direction of the time stamp ("IN" and "OUT" buttons).
Selecting a project
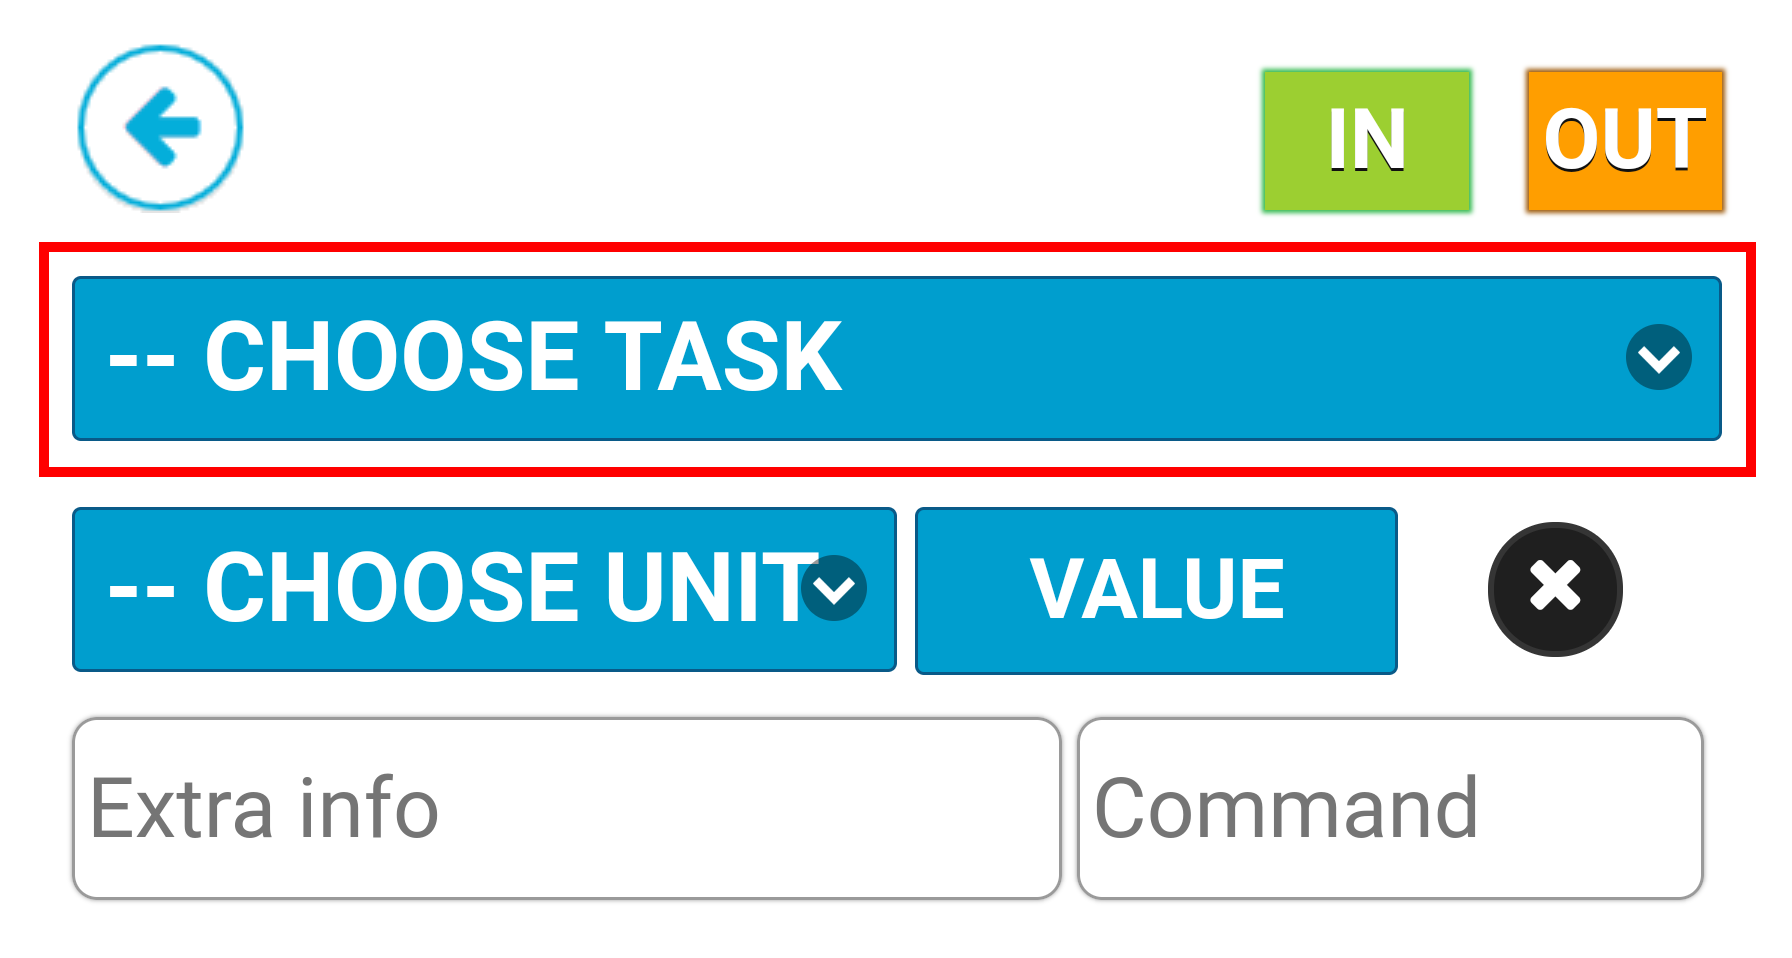
With the "-- CHOOSE TASK" menu it is possible to select a certain project if it differs from the default project or if there is not a default project set and it isn't clear which project the stamping is directed to. The menu shows only the projects with a stamping ID, which have set to be visible. If there isn't any project to choose from, there aren't any projects with a stamping ID that have been set to be visible.
| Info |
|---|
More information about selecting a default project can be found in the Clock card settings in Tuntinetti - Employee's default project guide. More information about selecting a project can be found in the Clock card settings in Tuntinetti - Selecting a project from a list guide. |
Selecting an expense
With the "-- CHOOSE UNIT" menu and the "VALUE" field it is possible to add expenses that are related to the stamping.
| Info |
|---|
| More information about adding expenses can be found in the Clock card settings in Tuntinetti - Selecting an expense from a list guide guide. |
Extra information

It is possible to add extra information related to the stamping by adding them in the "Extra info" field. Any information entered here will be added to the time tracking information in the "Additional information" field by default.
Directing time stamps
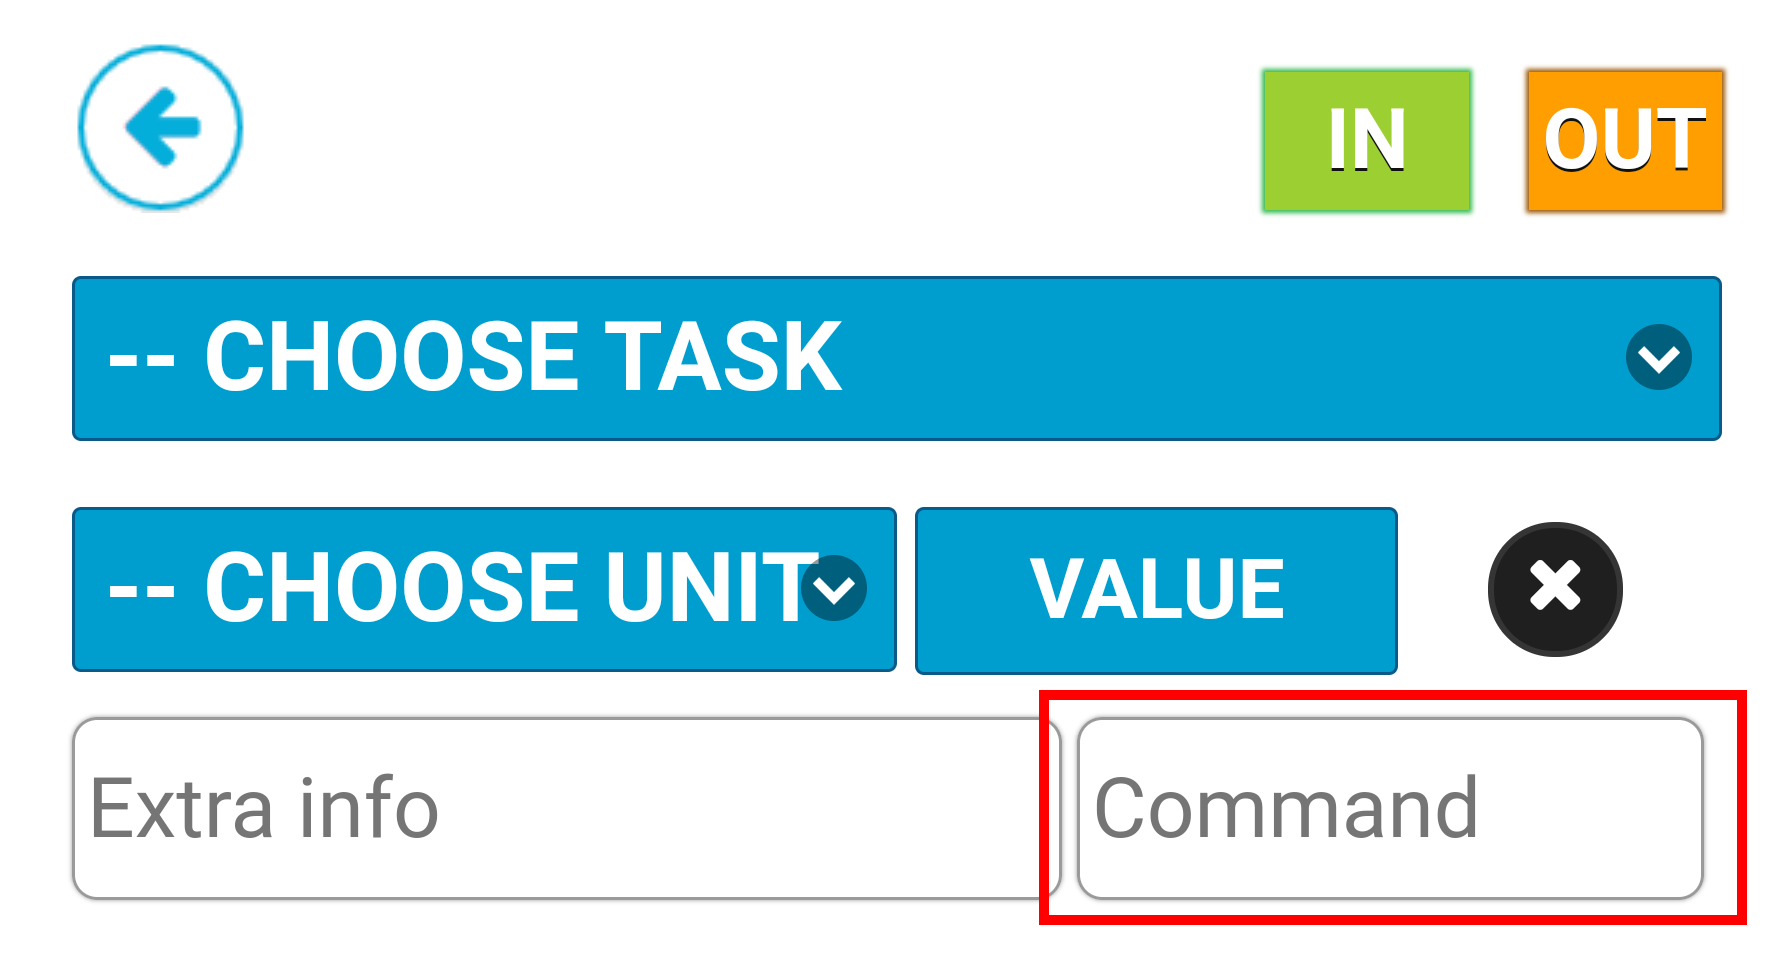
If the "-- CHOOSE TASK" menu isn't visible or the desired project isn't on it, a time stamp can be directed to a certain project by entering the project's code in the "Command" field.
| Info |
|---|
| More information about directing time stamps can found in the Clock card settings in Tuntinetti guide. |
Time stamp direction
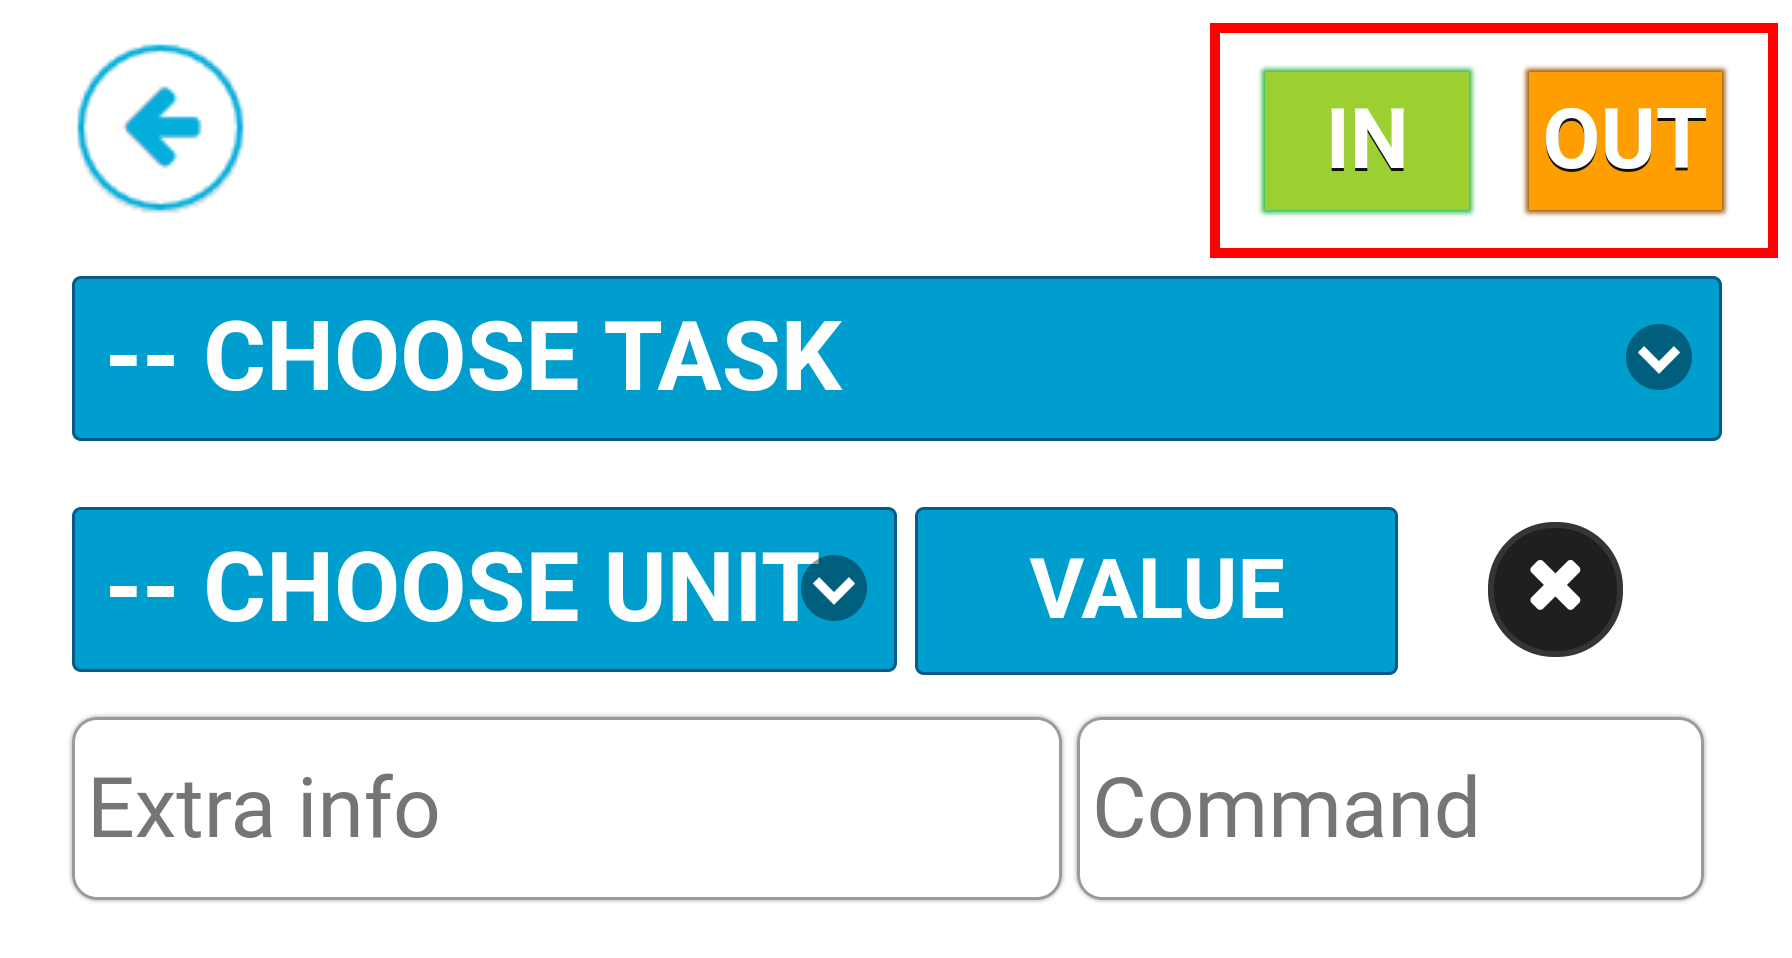
Time stamp is finished by selecting the direction of the stamp. If you want to stamp yourself in or change a project, press "IN". If you want to stamp yourself out from a project, press "OUT".
| Info |
|---|
| Notice that pressing "IN" or "OUT" ends the stamping procedure and you must select a project, add expenses and any additional information before pressing "IN" or "OUT". Usually when employees stamp themselves out, pressing the OUT button is enough, but in some cases it is possible to for example use long day code. |
Identification tags
NFC tag
...
Tuntinetti customer service provides more information about NFC products and how to order them if needed.
QR codes
QR codes are an easy and inexpensive way to use in the identification process. QR codes can be generated for free in the address http://www.qr-koodit.fi/generaattori. Just print the QR code with a sticker printer and attach it wherever you want. The size of the sticker can be quite small. A sticker that is the size of a finger tip is enough.
...